Tag: easy recipe

Sweet Potato Soup: Easy, satiating, and delicious! (RECIPE)

‘Tis the season for warm and inviting soups.

20151115_153649

If you’re looking for a flavorful and easy meal – or a nutrient-rich accompaniment to any meal – this rich and creamy sweet potato soup is sure to do the trick. With the sweetness from roasted sweet potatoes and a surprising little kick thanks to fresh ginger root, this takes very minimal prep time and will make you a batch big enough to last a week.

Okay, in my house it’s more like a few days, but you get the idea.

It’s also whole food and plant-based (vegan), Paleo (if you indulge in the tubers), and gluten-free for those with sensitivities. Sugar-free, Low-sodium, blah blah benefits, benefits, benefits, free this, free that… Basically, unless you’re not into nightshades or onions or garlic, this recipe is perfect parts of magic for everyone.

Soups are so satisfying. It is the perfect meal if you’re craving something savory and filling, but aren’t a fan of feeling weighed down after eating. Plus, soups like this are incredibly inexpensive to put together. If you’re a single college student or a part of a monster household, it’s a lot of bang for your buck – financially and nutritionally.

There is virtually no fat in this recipe, it’s high fiber, and drowning in beneficial nutrients to make your mind and body all kinds of happy. You can eat it alone, aside a sandwich, aside a salad, with sprouts on top, as a different kind of salad dressing, tossed with other veggies or pasta, or drink it warm out of a mug. Ver-soup-tility, for the win!

Enough talk. Recipe time!

20151115_150646-1

SUPER SWEET POTATO SOUP

Ingredients:

  • 2 large sweet potatoes
  • Half a large sweet (yellow) onion, chopped
  • 2 stalks celery, chopped
  • 2 large carrots, chopped
  • 2-3 garlic cloves, minced
  • 2 inches fresh ginger root, peeled and minced
  • 1 Tbsp Extra Virgin Coconut Oil
  • 1 cinnamon stick, broken in half (optional, but recommended! Use 1/4 teaspoon ground cinnamon otherwise)
  • 1 carton (4 cups) low-sodium, organic vegetable or chicken stock
  • Salt & Pepper, to taste
  • Additional water, if needed

Preheat oven to 425 F. Scrub potatoes and poke holes on top of each with a fork. Place on a tin-foiled cookie sheet or baking dish and place in oven for about 45 minutes or until knife tender and syrup begins bubbling through fork holes.

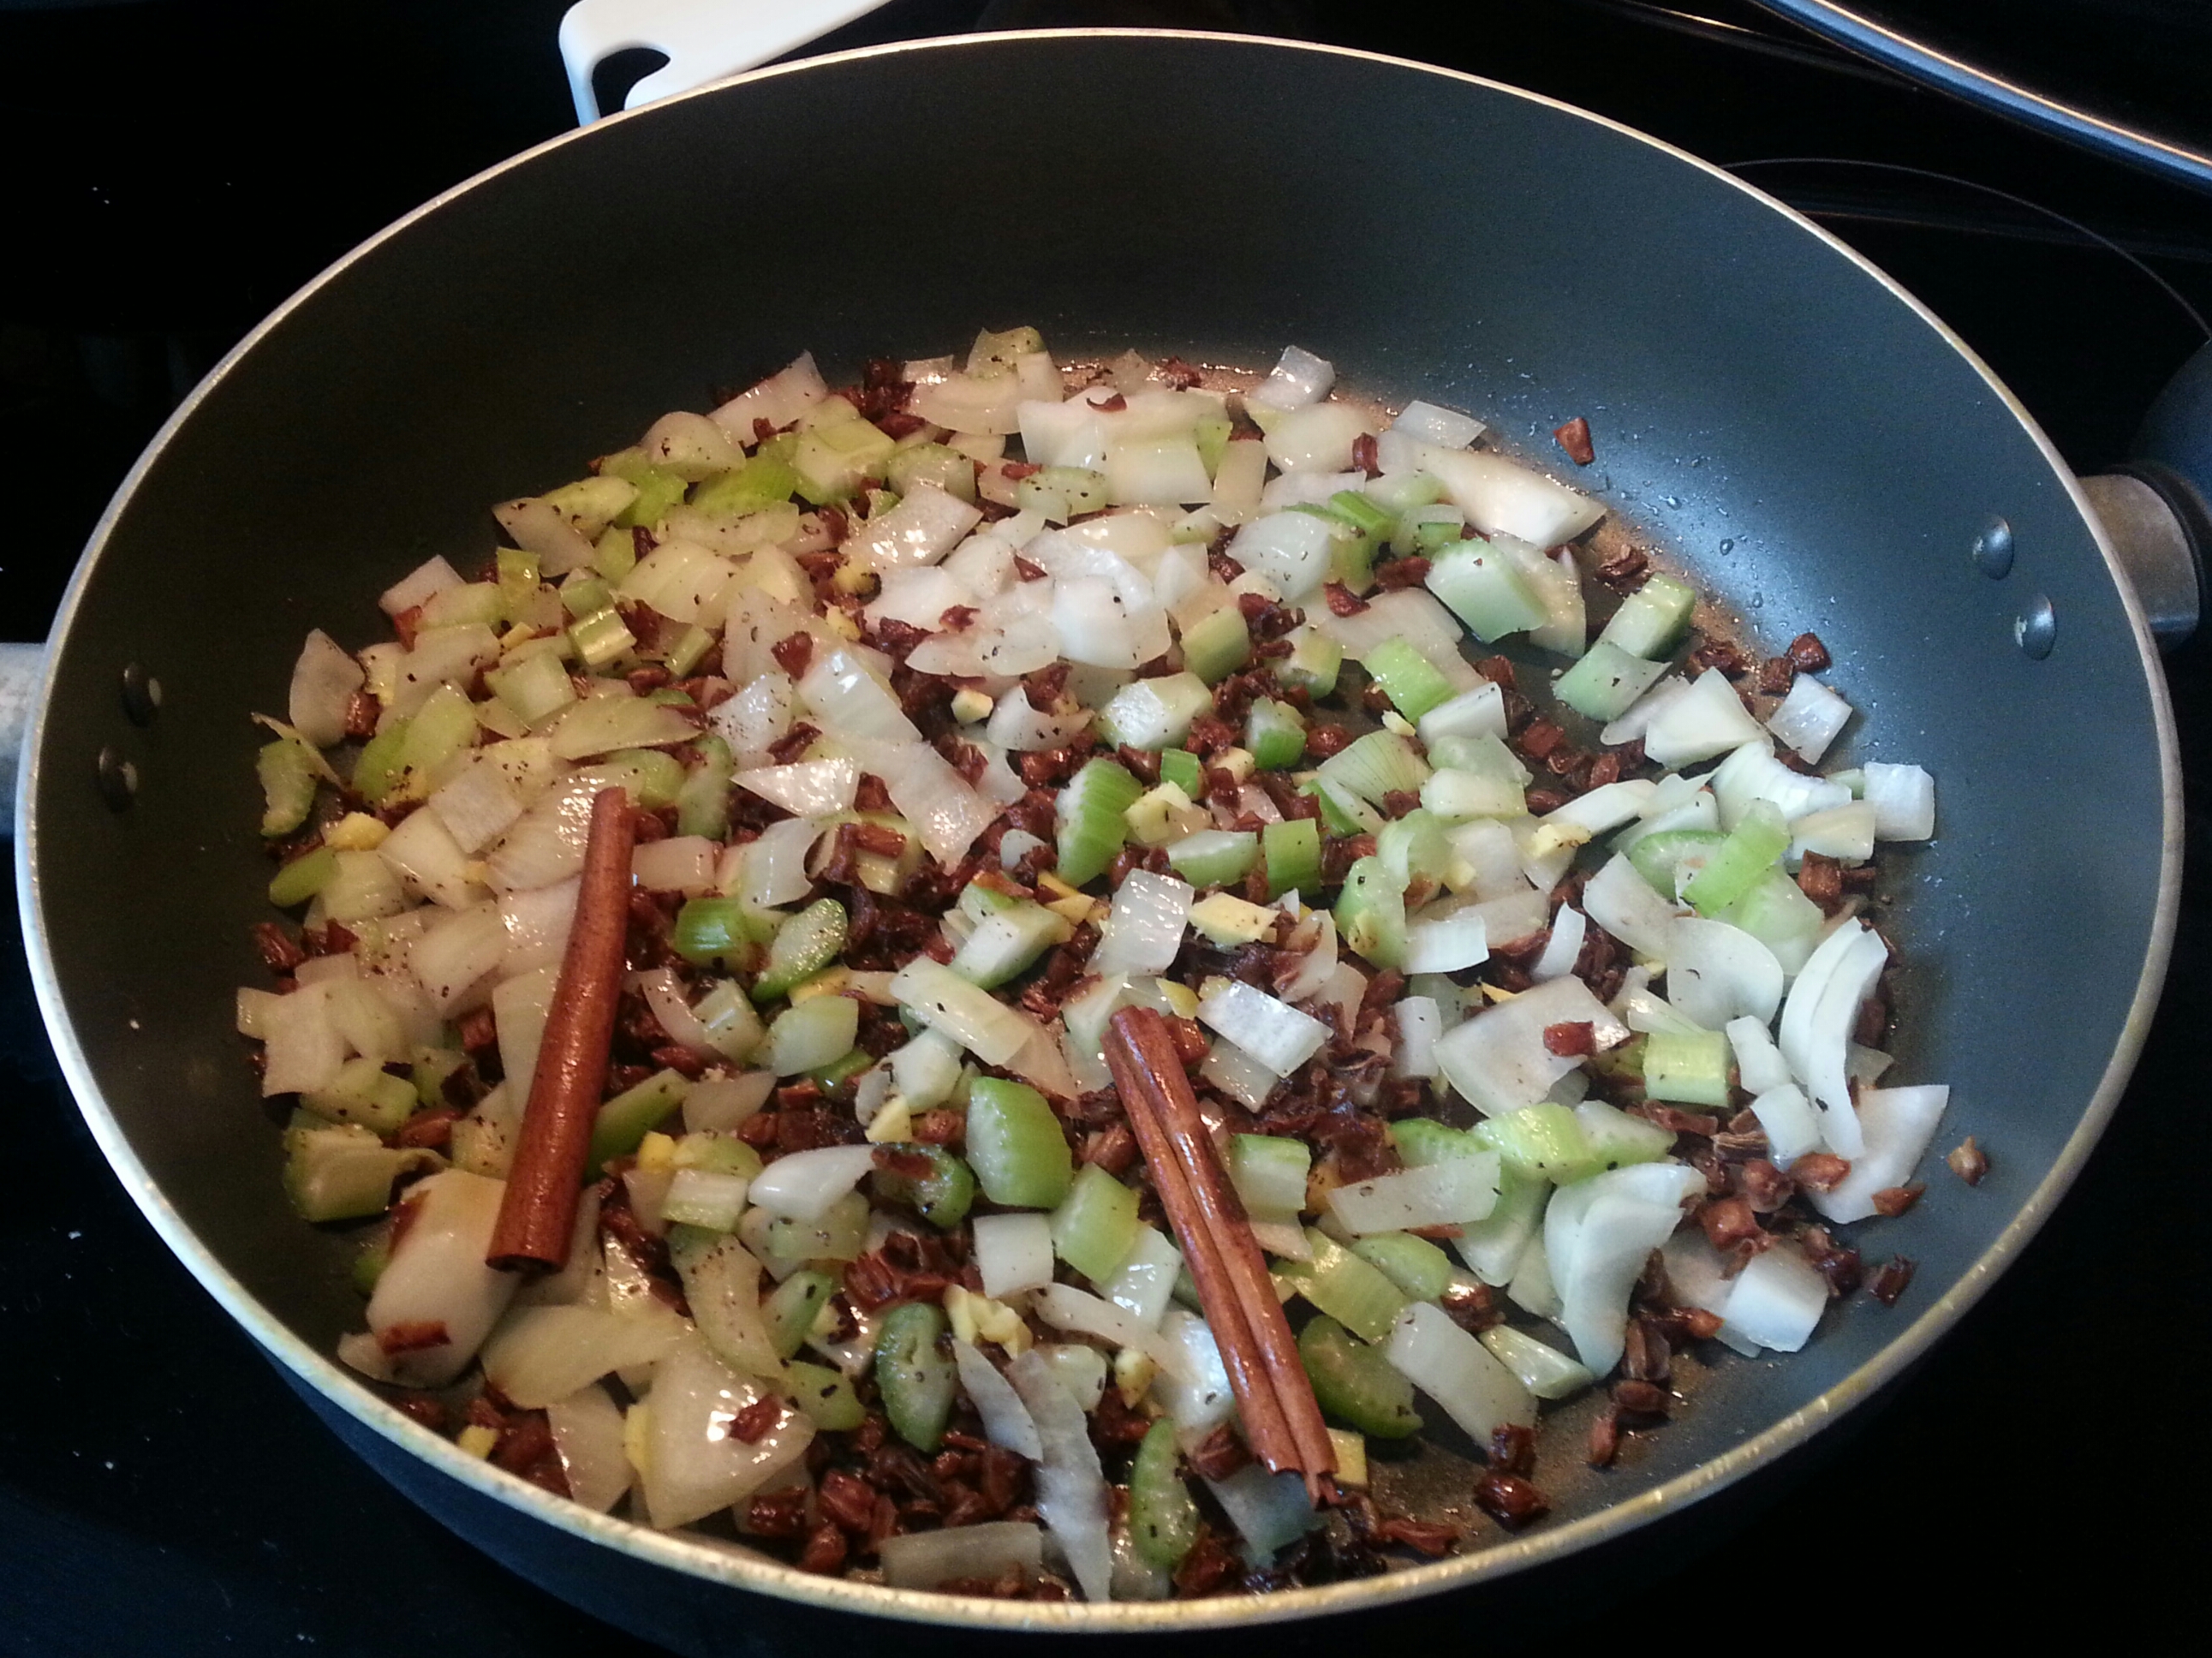
While the potatoes are in the oven, heat a large saute pan on the stove at about medium to medium-high heat.  Warm & melt coconut oil. Add in onion, celery, carrots, and ginger, and stir to mix and coat in oil. Add some salt & pepper.

Once onions are translucent and carrots and celery soften, add in garlic and saute a couple of more minutes (don’t let garlic get burned or too dark, it will result in a bitter taste). Add in about one cup of the vegetable or chicken stock and the cinnamon stick or ground cinnamon. Turn heat down to medium-low and let simmer. Add a little bit more salt & pepper.

20151115_150612-1

By this time, the ‘taters should be done in the oven. Take them out and let them cool a bit. Carefully cut a slit through the skin to help them cool down faster. Once they’re cool enough to handle, remove the skin and chop roughly.

20151115_151322

Add the potatoes to the saute pan and pour in the rest of the vegetable or chicken stock. Bring the mixture back up to a simmer and cover. Let simmer for about 5-6 minutes. If you have a potato masher, you can also gently mash them up in the saute pan. Add a little bit of salt & pepper.

Remove the cinnamon sticks and transfer the almost-soup from the saute pan into a high speed blender or food processor, and blend until smooth, about 2 minutes. Add water until consistency you like is reached.

20151115_153246

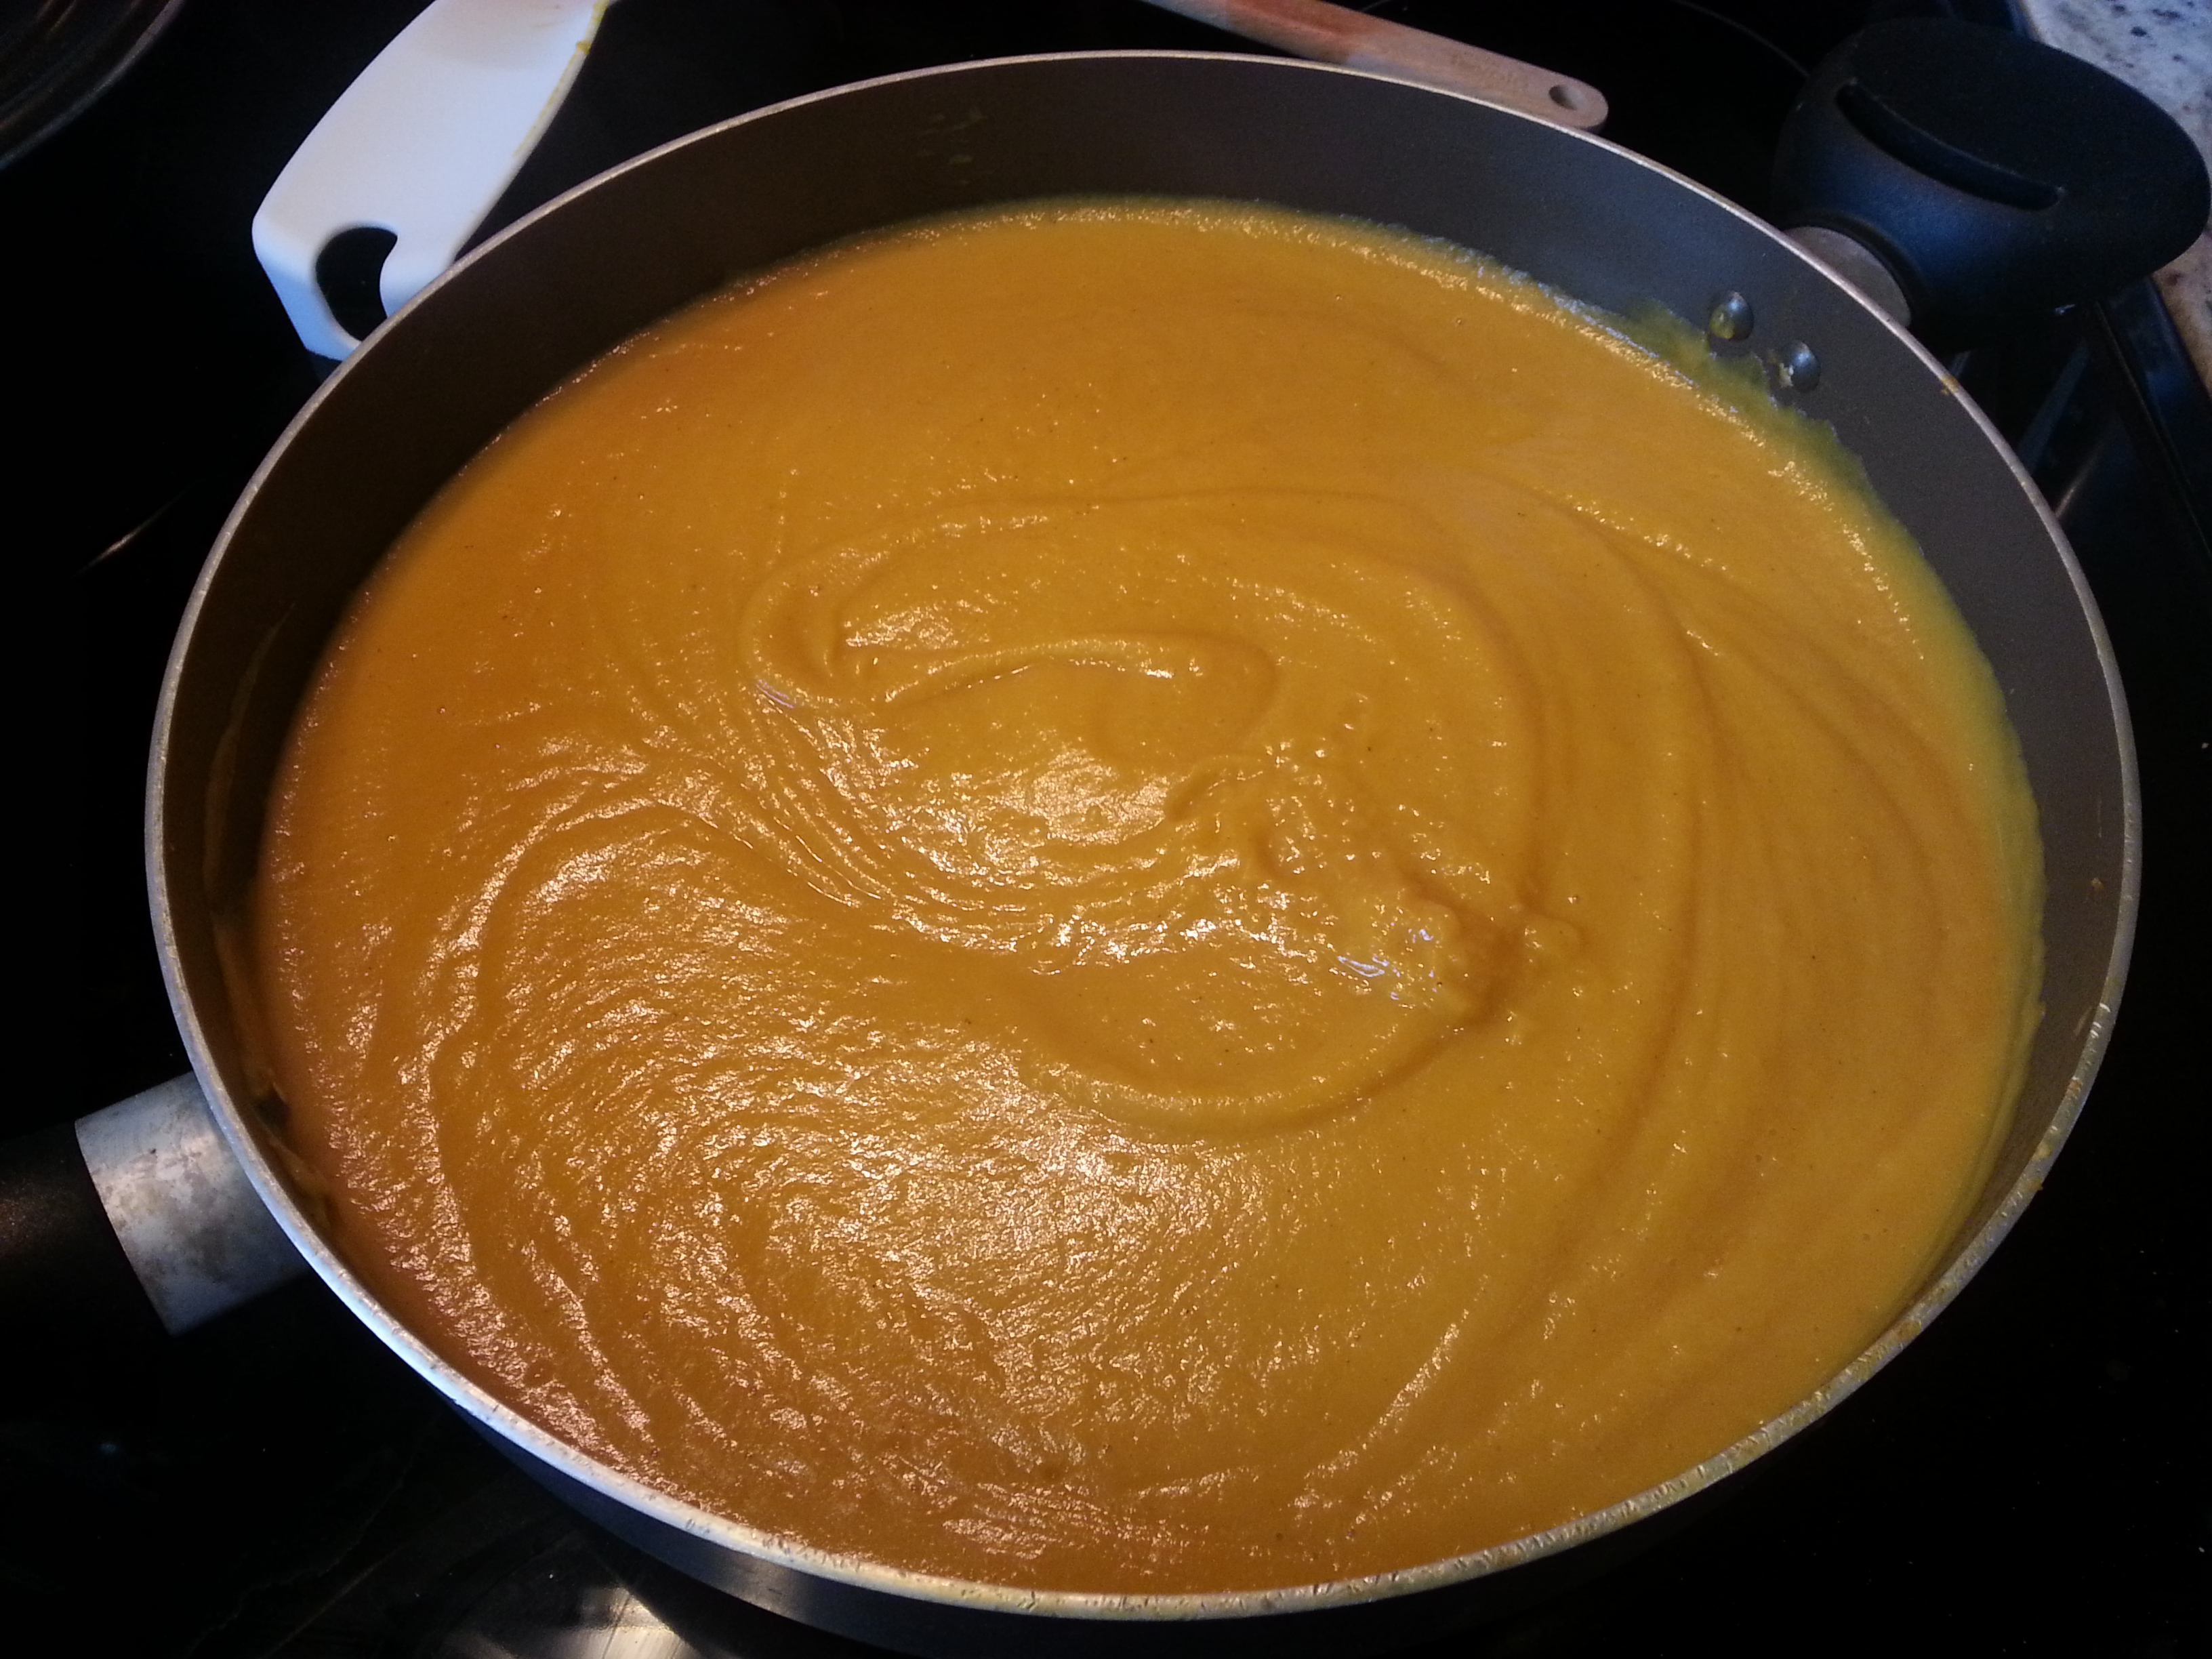
If you’re not eating it right away, pour the soup into containers and let cool before refrigerating. Otherwise, pour the now smooth-n-creamy soup back into the sauce pan and let simmer a couple of minutes before serving. Hint: It’s great with broccoli sprouts and/or sliced almonds on top.

20151115_153622-1

ENJOY!

Addictive Roasted Brussels Sprouts (RECIPE) – only THREE ingredients!

Brussels Sprouts are amazing. They are nutritious, all kinds of bite-sized cute, and incredibly versatile.

Versatile, indeed. And, yes, these are the actual sprouts used in today’s recipe. Because multitask (and pigtails).

I’m not going to go into some story-time shpeel before sharing this recipe. It is so delicious and so easy that I am sparing you any pre-recipe childhood memory or suspenseful read before I share the goods. I also like typing out Brussels Sprouts like it’s someone’s proper name. The cuteness wins over being grammatically correct.

Brussels Sprouts are nutritious, with tons of vitamins, minerals, and fiber – but many people miss out because, well, how do you make them tasty? Steam them and they will likely turn into mush, making you feel like you’re eating baby food. Same goes for boiling. Pan-fry them and you may get a crisp outside, but likely a still-raw-ish inside.

People either love cruciferous veggies (like Brussels Sprouts, cabbage, broccoli, and cauliflower) or they don’t. I don’t care what your preference is. If you try this recipe, which has only THREE main ingredients, it will blow your previously-Brussels-Sprout-hating mind.

Get ready for some yummy, candied cruciferous nuggets you will find yourself eating like popcorn.

20151018_160158Brussels Sprouts for dayssssssssss…


SWEET, MAPLE-ROASTED BRUSSELS SPROUT POPPERS

You will need:

1-2 stalks of Brussels Sprouts, for best flavor (or enough Brussels Sprouts to cover a large, rimmed baking sheet)

1/4 Cup extra virgin olive oil

1/2 Cup high-quality, pure maple syrup

Salt & Pepper (to taste, preferably fresh ground)

Easy-peezy Directions:

  1.  Preheat your oven to 375 degrees F.
  2.  Rinse Brussels Sprouts well. If cutting from stalk (as I did for this recipe), rinse sprouts on stalk before cutting. Then proceed to *cut the sprouts off the stalk, halve them, and I also suggest cutting out a bit of the thick stem part from the base to prevent any bitterness once they are cooked. To do this, cut out a “V” of the firm white “heart” that would have been the base of the Brussels Sprout (you can peep this in the photos). Collect all your sprouts in a large bowl after the cutting.
  3. In a liquid measuring cup, pour in olive oil and maple syrup (measuring as you pour… win-win for less dirty dishes) and whisk well. Pour all over the Brussels Sprouts in the bowl and mix around until they are all coated.
  4. Pour the sprouts on your large, rimmed baking sheet. Season well with salt and pepper (I suggest freshly ground Himalayan Sea Salt & black pepper). Give another quick toss, and add a touch more salt and pepper. Sprouts should be in a single layer on the sheet, for even cooking.
  5. Place in the preheated oven for 40-50 minutes, making sure to toss half-way through the cooking time to get everything evenly roasted. Sprouts are done when most have a dark brown, crisp outer leaf and the larger ones are fork tender.
  6. Enjoy your insanely delicious cruciferous candy. Eat them as a side dish, pop ’em as a lone snack, mix them into a creamy soup (like my Simply Creamy Butternut Squash Soup), or share them with your veggie-loathing friends to convert them to the dark (leafy green) side.
20151018_160152
Withholding the excitement of such a winning recipe was 98% impossible, as proven by the blurriness (and the fork).

*Careful cutting those things off the stalks, especially if you are really excited and halfway paying attention… and just bought shining, new, sharp specialty knife from Costco. And your name is Jasmin. Yes, I nearly sliced my thumb clear off whilst preparing this recipe. However, the end result was clearly totally worth it.

Fun fact: Brussels Sprouts is commonly misspelled as “Brussel” Sprouts. Who’s guilty?

The BEST and Easiest Banana Pancake Recipe (using Manzano or “Apple” Bananas)

These amazing, healthy, easy-to-make pancakes were tweaked to perfection after about a week of making them daily… for dinner… because sometimes, week long pancakes-for-dinner-kicks just happen. And when they do, you just have to go with it.

Thank goodness I hopped on this nightly breakfast train, because by the end of the week I can hands-down say that I perfected this simple little recipe that I am now super excited to share!

It all started off with a little trip to one of the local Asian markets, where I always make sure to pick up at least one random fruit or veggie that I wouldn’t necessarily find in a typical grocery store.

Enter: These little guys…

Not my photo, but totally my little Asian banana find.

When I got them from the store, they weren’t as yellow as the photo above (with some black spots and edges). As one who is well versed on the ideal ripeness of regular bananas, they seemed ready to enjoy! But, as I soon found out, these bananas were nothing like regular bananas (except appearing like a mini-version). They were not even close to ripe and actually closer to tasting like a starchy, rough, unpalatable banana fraud.

I then did some research and realized that these particular bananas are ripe when the peel is about black – similar to plantains. So, a week or so later, I tried another one. And I finally understood what others had said about these lil’ nanaz tasting like an apple and banana had a baby with a hint of strawberry. That is pretty much exactly what they taste like – and it’s amazing.

So, lessons to learn here:

  • Baby-looking bananas need to be black (or nearly black) to be the most palatable.
  • They are also “starchier” with more bite than regular bananas, even at their ripest.
  • They taste like an apple and banana had a baby, and that baby only eats strawberries.
  • Most importantly, they’re dang tasty and add the perfect non-mushy-yet-banana-licious texture and flavor to the world of banana pancakes.

Back story over, onto what matters: the recipe!

20150213_150936

The BEST and Easiest Banana Pancake Recipe

(using Manzano or “Apple” Bananas)

Ingredients:

4 manzano bananas (ripe and black), mashed – about 150g *You can use 2 regular bananas equaling the same amount, but this may result in less dense/mushier pancakes
1 egg (or flax substitute using a 1:3 Tbsp. ratio of ground flaxseeds to water) *if using regular bananas and flax substitute, do not add water and use 1 Tbsp. ground flaxseeds only
1/2 Tbsp. coconut oil
Scant 1 tsp vanilla extract
3 Tbsp. quinoa flour
1/2 scoop Rawfusion Protein Powder in Vanilla (or your favorite plant-based protein powder; using whey will change pancake consistency)
1/2 tsp baking powder
1/4 tsp baking soda
2 tsp (small splash) apple cider vinegar
Good pinch of salt
1/4 tsp ground cinnamon

Directions:

  1. Mix mashed bananas, egg/flax egg, vanilla extract, coconut oil, and cinnamon together.
  2. Add dry ingredients and apple cider vinegar, and whisk or mix until all incorporated.
  3. Grease skillet lightly at medium/slightly before medium heat (level 5 or 250 degrees).
  4. Spoon 1/4 cup or so of batter into pan and spread out eventually.
  5. Let cook 2-3 minutes until edges look dry and top just begins bubbling, flip and cook another 2 minutes.
  6. Stack up and enjoy! (Makes four 5-inch pancakes, or one serving)

These can also be frozen after cooled, and reheated in a toaster oven! Practical AND tasty!

Kale & Quinoa Bowl: Easiest, Filling, Nutritious Go-To Meal (RECIPE)

I introduce you to my latest obsession:


Nom nom nom....


You can’t really tell by the picture, but that bowl is HUGE and it’s holding 1 cup of cooked quinoa and 100g of chopped kale… along with an insanely delicious dressing that I will share below. This simple whole food duo is the perfect, delicious, filling, hearty base for so many different things – the list is nearly endless.

You can go savory, sweet, or spicy; you can add everything from more vegetables like tomatoes, cucumber, zucchini, or pumpkin – to fruits like chopped dates, figs, berries, or apples.

Another super bonus? If you’ve put yourself into a nutritional category box – I bet this fits into it. It’s all the “free’s” (Gluten-free, Dairy-free, nearly fat-free, egg-free) and all the “friendly’s” (Paleo-friendly, Vegetarian–friendly, Vegan-friendly, Carb-friendly, Allergen-friendly).

And when it comes to macro-nutrient ratios, this particular serving size has:

272 Calories

11g Protein

39g Carbs

5g Fat

7g Fiber

56g Sodium

Adding even more benefit? Both of these foods are incredibly nutrient dense in not only the macros above, but the micros such as: tons of anti-inflammatory phytonutrients, vitamins and minerals ranging from B-vitamins to Vitamin E and zinc, body-loving fibers, and more.

Basically, quinoa and kale are soul mates in my book.

Like I said, there are ENDLESS directions this two-ingredient base can go; but let’s start with one of my favorites these days…

Creamy Southwest Spice Dressing

Ingredients:

  • 2-3 Tbsp Lemon Juice
  • .5 to 1 Tbsp Extra Virgin Olive Oil
  • 1 heaping tsp Tahini (sesame seed butter, in Middle Eastern section of most markets)
  • 1 Tbsp Dijon Mustard
  • 2 tsp Mrs Dash salt-free Southwest Chipotle Seasoning
  • 1/4 tsp Himalayan Sea Salt (I just fresh grind in to taste)
  • 2 Tbsp Balsamic Vinegar
  • 1 Scant Tbsp Garlic Powder OR 2 cloves minced garlic
  • 2 tsp Onion Powder OR 2 Tbsp minced red onion
  • Freshly Ground Black Pepper (to taste… I like quite a bit)
  • Half a dropper of liquid Stevia, OR 1/2 Tbsp honey, OR 1 Tbsp Stevia in the Raw

Directions: Put it all in a bowl, whisk together, and toss with quinoa and kale…. That’s it. (Hint: make ahead of time by at least 30 minutes to let the flavors all soak up and merry. Nom!)

I always have a few cups of cooked quinoa in the fridge that I prepare in bulk in my rice cooker, one or two days a week. As for the kale, get 2-3 BIG handfuls, remove any stems (they tend to be a bit bitter sometimes), and chop up well before tossing.

Coming soon:

The True Health Trifecta Nutrition & Recipe Book:

Simple Salads, Soups, Sauces, & Dressings Edition!

This is turning out to be the perfect collection for everyone; from those beginning their health and fitness journey, to those well on their way and looking for new, EASY, healthy go-to meal ideas!

It will include TONS of crazy-easy yet healthy recipes like the one above; plus photos, nutritional facts & tips, kitchen & pantry basics and recommendations, my Macro-Nutrient Cheat Sheet, Pre- and Post- workout meal ideas, Soups, Salads, Dressings, and more!

Not to mention, unless you are allergic to a specific food, this book is EVERY-diet friendly! So whether you have put yourself in the Paleo box, Vegan category, High-carb-low-fat, Low-carb, Gluten-free, 80/10/10, intermittent fasting, carb-cycling… I purposefully made this a compilation of nutritious options that can be enjoyed by the majority of dietary lifestyles out there!

And, I know most people don’t have the time or interest to become the next Iron Chef in the kitchen… especially with the hustle and bustle of every day life. That’s why I made sure the recipes and tips in this book aren’t incredibly elaborate or time consuming. These are some simple basics to help anyone successfully achieve their goals without spending hours preparing and while getting in nutrient-dense foods that taste flipping amazing.

Can you tell how mega excited I am to be putting this together for you guys?! :)

Make sure to sign up for the newsletter and like the True Health Trifecta Facebook page for word on when it is available for sale in the shop! :)

Homemade, Healthy, EASY Doggy Treats! (RECIPE)

Meet Athena…

  IMG_1133-1 IMG_1131-1 IMG_1136-1

She was less than 3 months old in the photos above, but recently came upon her **drum roll**  1st birthday! As much as I’d love to say this adorable furry creature is mine, she is the four-legged baby of one of my awesome local clients… but that doesn’t mean her birthday goes without a celebratory gift.

20140807_184242

Being the impulsive baker that I am, I took this opportunity to whip up some birthday treats (my first attempt at baking for the canine kind) that ended up turning out pretty amazing according to Athena’s reaction, shared here via her Mommy’s review:

Email Subject: Four out of four paws rating

“I put the A and W on a plate for her and she snatched up the A before I could get a pic! She took it in to the dining room, ate it in a flash, then went back for the W. After it was gone, she went back looking for more. But she’ll have to wait!

Thank you so much. That was extremely thoughtful of you. She LOVED them. Usually she sniffs a new treat a few times and mouths it a bit before eating it. Not yours. She ate them right up. She could tell right away they were awesome.”


photo 1(1)   photo 3

photo 2(1)   photo 4

Nothing like having your culinary prowess validated by multiple species! WIN.

With a review like that and actually remembering the recipe due to it being so crazy simple, I definitely thought it was worth sharing with the vast population of doggy lovers out there. So, here you go!

Healthy, EASY PB-Sweet Potato Doggy Treats!

  • 2 ½ cups whole wheat or all purpose flour
  • 2 eggs
  • 1 jar of Sweet Potato baby food (ingredients should only be sweet potato + water)
  • 1 Tbsp Black Strap Molasses (or honey)
  • ¼ tsp salt (I used Pink Himalayan)
  • 1 tsp ground cinnamon
  • 2-3 heaping Tbsp smooth Peanut Butter
  • Chicken Stock or Broth (or just water works!)
  1. Pre-heat the oven to 350 degrees.
  2. Mix all of the above ingredients (except for the chicken stock/water) in a bowl until it’s all incorporated well.
  3. Add in chicken stock/water to get the desired consistency (it should be a somewhat “dry” dough that you can roll out… you honestly may not even need any extra liquid).
  4. Sprinkle a bit of flour on a flat surface and flop the dough over from the bowl.
  5. Roll it out to be about 1/2 inch thick, and use cool cookie cutters like these (or your free-hand shaping skills like I did!) to form the cookie shapes.
  6. Place on a cookie sheet and bake for about 45 minutes, or until cookies are lightly browned on edges and a bit stiff.
  7. Take out and let cool on a cookie rack, or you can just turn the oven off and let them cool in there! (They will harden up a bit as they cool, getting that doggy biscuit kind of feel; so don’t worry if they seem soft when they are freshly done baking.)

Then again, I’m sure your doggy won’t mind one bit!

20140807_154413 20140807_154354

Enjoy, Canine Friends!

P.S. If you try out this recipe, share it on Instagram or Facebook and use hashtag #TrueHealthTrifecta so I can see how yours turned out! ;)

EASY, Go-To Protein Shake Recipes!

Common Question: How do I USE protein powder?

Depending on the type of protein powder (for the sake of simplicity, I will refer to the two more common comparisons: whey and plant-based), there is little difference when it comes to actual preparation and ways to enjoy.

Compared to whey, plant-based protein (like my favorite: RawFusion), tends to act more like a ‘flour’ when mixed or baked into different things. It is a bit thicker, slightly harder to blend, and can even be made into a pudding quite easily (similar to casein protein for anyone familiar with Casein Fluff). Whey, however (especially whey isolate), tends to become more gummy and liquid-like and would not suffice in a pudding-type treat. Due to this, it does blend into liquids or other foods, like yogurt, much faster and easier.

So in the case of consistency, plant-based proteins = thicker like flour; whey proteins = easier to blend into liquid. Regardless, both are great for blended smoothies. And since most clients I have worked with are in need of a convenient way to use protein powder as opposed to becoming the next Master-of-Creative-Culinary-Uses-For-Protein (guilty, as proven by the video at the bottom of this post), I will share a couple of my favorite go-to protein smoothie ideas that are easy, delicious, and nutritionally-sound.

These are great any time of day: breakfast, an hour or so before your workout, after your workout, or literally any time. Sure, there are certain benefits timing-wise if you want to get more detailed with the science of nutrient absorption versus activity and a whole slew of other metabolic factors, but what ultimately matters is simply getting into the routine of having additional protein and feeding your body favorable nutrients in general. Trust me. Do not over-complicate things, especially with new routines. Focus on the grand scheme rather than minute details. Have your shake or smoothie where it fits best for you and your schedule.

Remember: it is best to start with small and simple habits!

Protein Mocha Frappuccino

  • 8-10 oz. unsweetened almond or coconut milk
  • 1 scoop Protein Powder of choice (or 2 for active men) *I use RawFusion
  • 1 Tbsp. Instant Coffee Granules
  • 1 Tbsp. Unsweetened Cocoa Powder *omit if you’re using Chocolate-Flavored Protein
  • 1 Handful of Ice
  • 1 Tbsp. Chia Seeds OR 2 Tbsp. Ground Flaxseed
  • Optional: 1 tsp. vanilla extract, or any extract of choice! Coconut, Mint, Orange, Banana.. tons of fun flavors out there! Be creative!

Blend in blender and enjoy!

Fruity Protein Smoothie

  • 8-10 oz. unsweetened almond or coconut milk
  • 1 scoop Protein Powder of choice (or 2 for active men) *I use RawFusion Vanilla
  • A big handful of raw spinach
  • 1 Cup Frozen Berries
  • 1 Tbsp. Nut Butter, Coconut Butter, Chia Seeds OR 2 Tbsp. Ground Flaxseed
  • Optional: 1 tsp. vanilla extract, or any extract of choice! Coconut, Orange, Banana… get creative!

 Blend in blender, sprinkle some cinnamon on top, and enjoy!

*For those seeking a trusty, inexpensive little blender, I always suggest this Hamilton Beach Single Serving Blender with Travel Lid. It is easy to find (sold at Wal-Mart or Amazon.com for $12-14), blends your shake smoothly, lasts FOREVER (I’ve had mine for over 6 years, plus check out these reviews), and is great to keep at work and/or at home.

The great thing about smoothies is that you CAN very easily adjust and get creative according to your taste! Make it a Veggie Smoothie by adding in some cucumbers, celery, spinachMake it an Apple Pie Smoothie by using vanilla protein, cinnamon, a chopped apple (or even organic apple sauce), and some walnutsMake a Pumpkin Pie Smoothie by using pumpkin puree, vanilla protein, cinnamon, ginger, nutmeg, and some pecans… Don’t be scared to try new things! You’ll be surprised at some of the deliciousness you come up with.

For those who ARE open to becoming more creative with protein powder, try mixing it into some organic Greek Yogurt, or mixing it into cooked and cooled down oatmeal, or even making it into a pudding like I mentioned and using it as a dip or sweet cream sauce like I did in this recipe.

Want to get really fancy?

Check out this video recipe for Protein Marshmallows!

Coming soon: Recipes for both my easy, homemade chocolate bars and simple, sprouted grain “graham” crackers to use with the Protein Marshmallows for the delicious S’mores-From-Scratch as shown here…

Smores

Like I said, the possibilities really are endless! :)

The Ultimate Chopped Spring Salad

This Healthy Recipe of the Month is probably my favorite go-to salad. It’s just perfect to fulfill a craving… it’s filling but still refreshing as a salad should be. I’m a huge texture person and my perfect meal usually has a mix of different bites; crunchy, soft, crispy, creamy, salty, and sweet. This salad definitely has all of that rolled into one. Not only that, but as you can see, it is ridiculously easy to put together AND can be served as a main dish or side salad to accompany a meal.


Hope you enjoy it as much as I do!


Nom nom nom .........
Nom nom nom ………


As I’ve mentioned in previous posts, this is an easily printable format that I provide for health clubs like Anytime Fitness in Ormond Beach and Anytime Fitness in Winter Park, both in Florida. If you would like to receive a Healthy Recipe of the Month for your fitness club or gym, please don’t hesitate to contact me and I will be happy to add you to the list! :)


Question of the week:
What is the BEST salad, homemade or restaurant, that you’ve ever had?


Quinoa Cocoa Cakes for Two

… or for however many you like, really. This impromptu what-do-I-have-in-the-pantry-that-I-can-make-dessert-ish recipe is VERY easy and came out to two super moist and tasty little cakes. The consistency is almost fudge-like; the outside is just crisp enough to make it sort of a less gooey chocolate lava cake.


Yes it is as decadently good as it looks.....
Yes it is as decadently good as it looks…..


And added bonus, they are egg-free, gluten-free, paleo-friendly (depending how strict of a regimen you’re on considering there is a pseudo-grain flour involved), and it can easily be vegan/dairy-free by simply substituting the kind of protein used in the sweet cream sauce to something like Sunwarrior Protein-Vanilla. Make sure to check out the notes below the recipe for more tips! :)


Try it out and let me know what you think!


Quinoa Cocoa Cakes for Two

Ingredients:

1/4 Cup Quinoa Flour

2 Tbsp cocoa powder

3 Tbsp Stevia*

1/4 tsp. Baking Powder

Pinch of salt

Scant 1/4 tsp instant coffee or espresso (optional)

1 Tbsp Ground Flaxmeal

1 Tbsp Extra Virgin Olive Oil*

1/4 Cup + 3 Tbsp water

1/4 tsp. Vanilla Extract


What to do:
Preheat oven to 350.*
In a small glass or bowl, whisk together flaxmeal, olive oil, water, and vanilla extract. Let sit for 5 minutes.
In another bowl, mix together quinoa flour, cocoa powder, stevia, baking powder, instant coffee, and salt.
Add flax liquid to dry ingredients and whisk together well.
Split batter into two greased large muffin tins (or I had mini-bundt tins). Bake for 20-25 minutes, until toothpick inserted comes out clean.
Plate each on top of half the Sweet Cream Sauce. Optional tops include.. well.. basically whatever you want. I had a dollop of Son of a Butter! Smoky Bacon Peanut Butter and a fresh strawberry.
*Next time I may try baking at 375 for around 18 minutes. If you like a more cakey, less fudgy center, this option would encourage that more.

 
Crazy Easy Sweet Cream Protein Sauce:

Scoop 1-2 Servings of your favorite vanilla protein powder into a bowl (I used Vi-Shape by Body By Vi since that is all I had on hand) and whisk with just enough water for thick sauce consistency. I added a touch of cardamom and cinnamon for an extra yumminess.


P.S. Don’t forget, if you want photos of recipes as they are created, workout tips, free gym routines, and other random goodness, you can follow me on Instagram or Twitter too. Happy New Year, everyone!