Everyone loves Chipotle (right?) and their simple yet delicious spread of Tex-Mex goodness.
But… let’s be honest. Cost-wise, they make a killing charging what they do for some of the most affordable types of food around. Namely, rice ‘n beans (or arroz y frijoles).
Even if you do skimp on the guac (which, if so, who ARE you?) eating at places like Chipotle often can definitely put a dent in your finances.
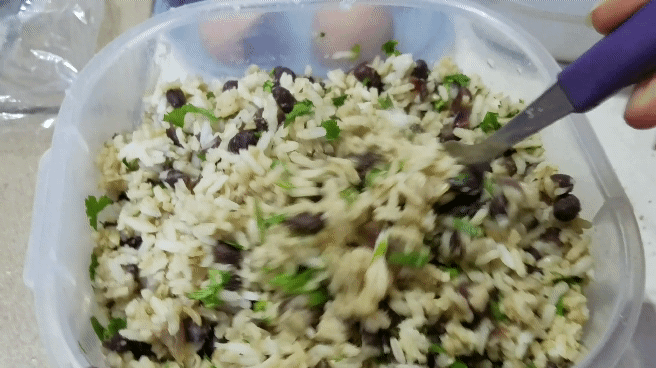
So, allow me to bring to you my HOMEMADE CILANTRO LIME RICE & BEANS (that are better than Chipotle).
I love me some rice ‘n beans, as do most people I know. Especially while traveling through Latin America, where gallos pinto – the traditional rice ‘n beans dish – is typically served with breakfast.. AND lunch.. AND dinner at times… I grew to love them even more rather than get tired of them.
I love this dish so much that there are at least 5 different, flavorful rice ‘n beans recipes I plan to share here on the blog (as well as helpful tips and advice for anyone who plans on traveling or living in places like Costa Rica).
It all starts with the two [obvious] key ingredients…
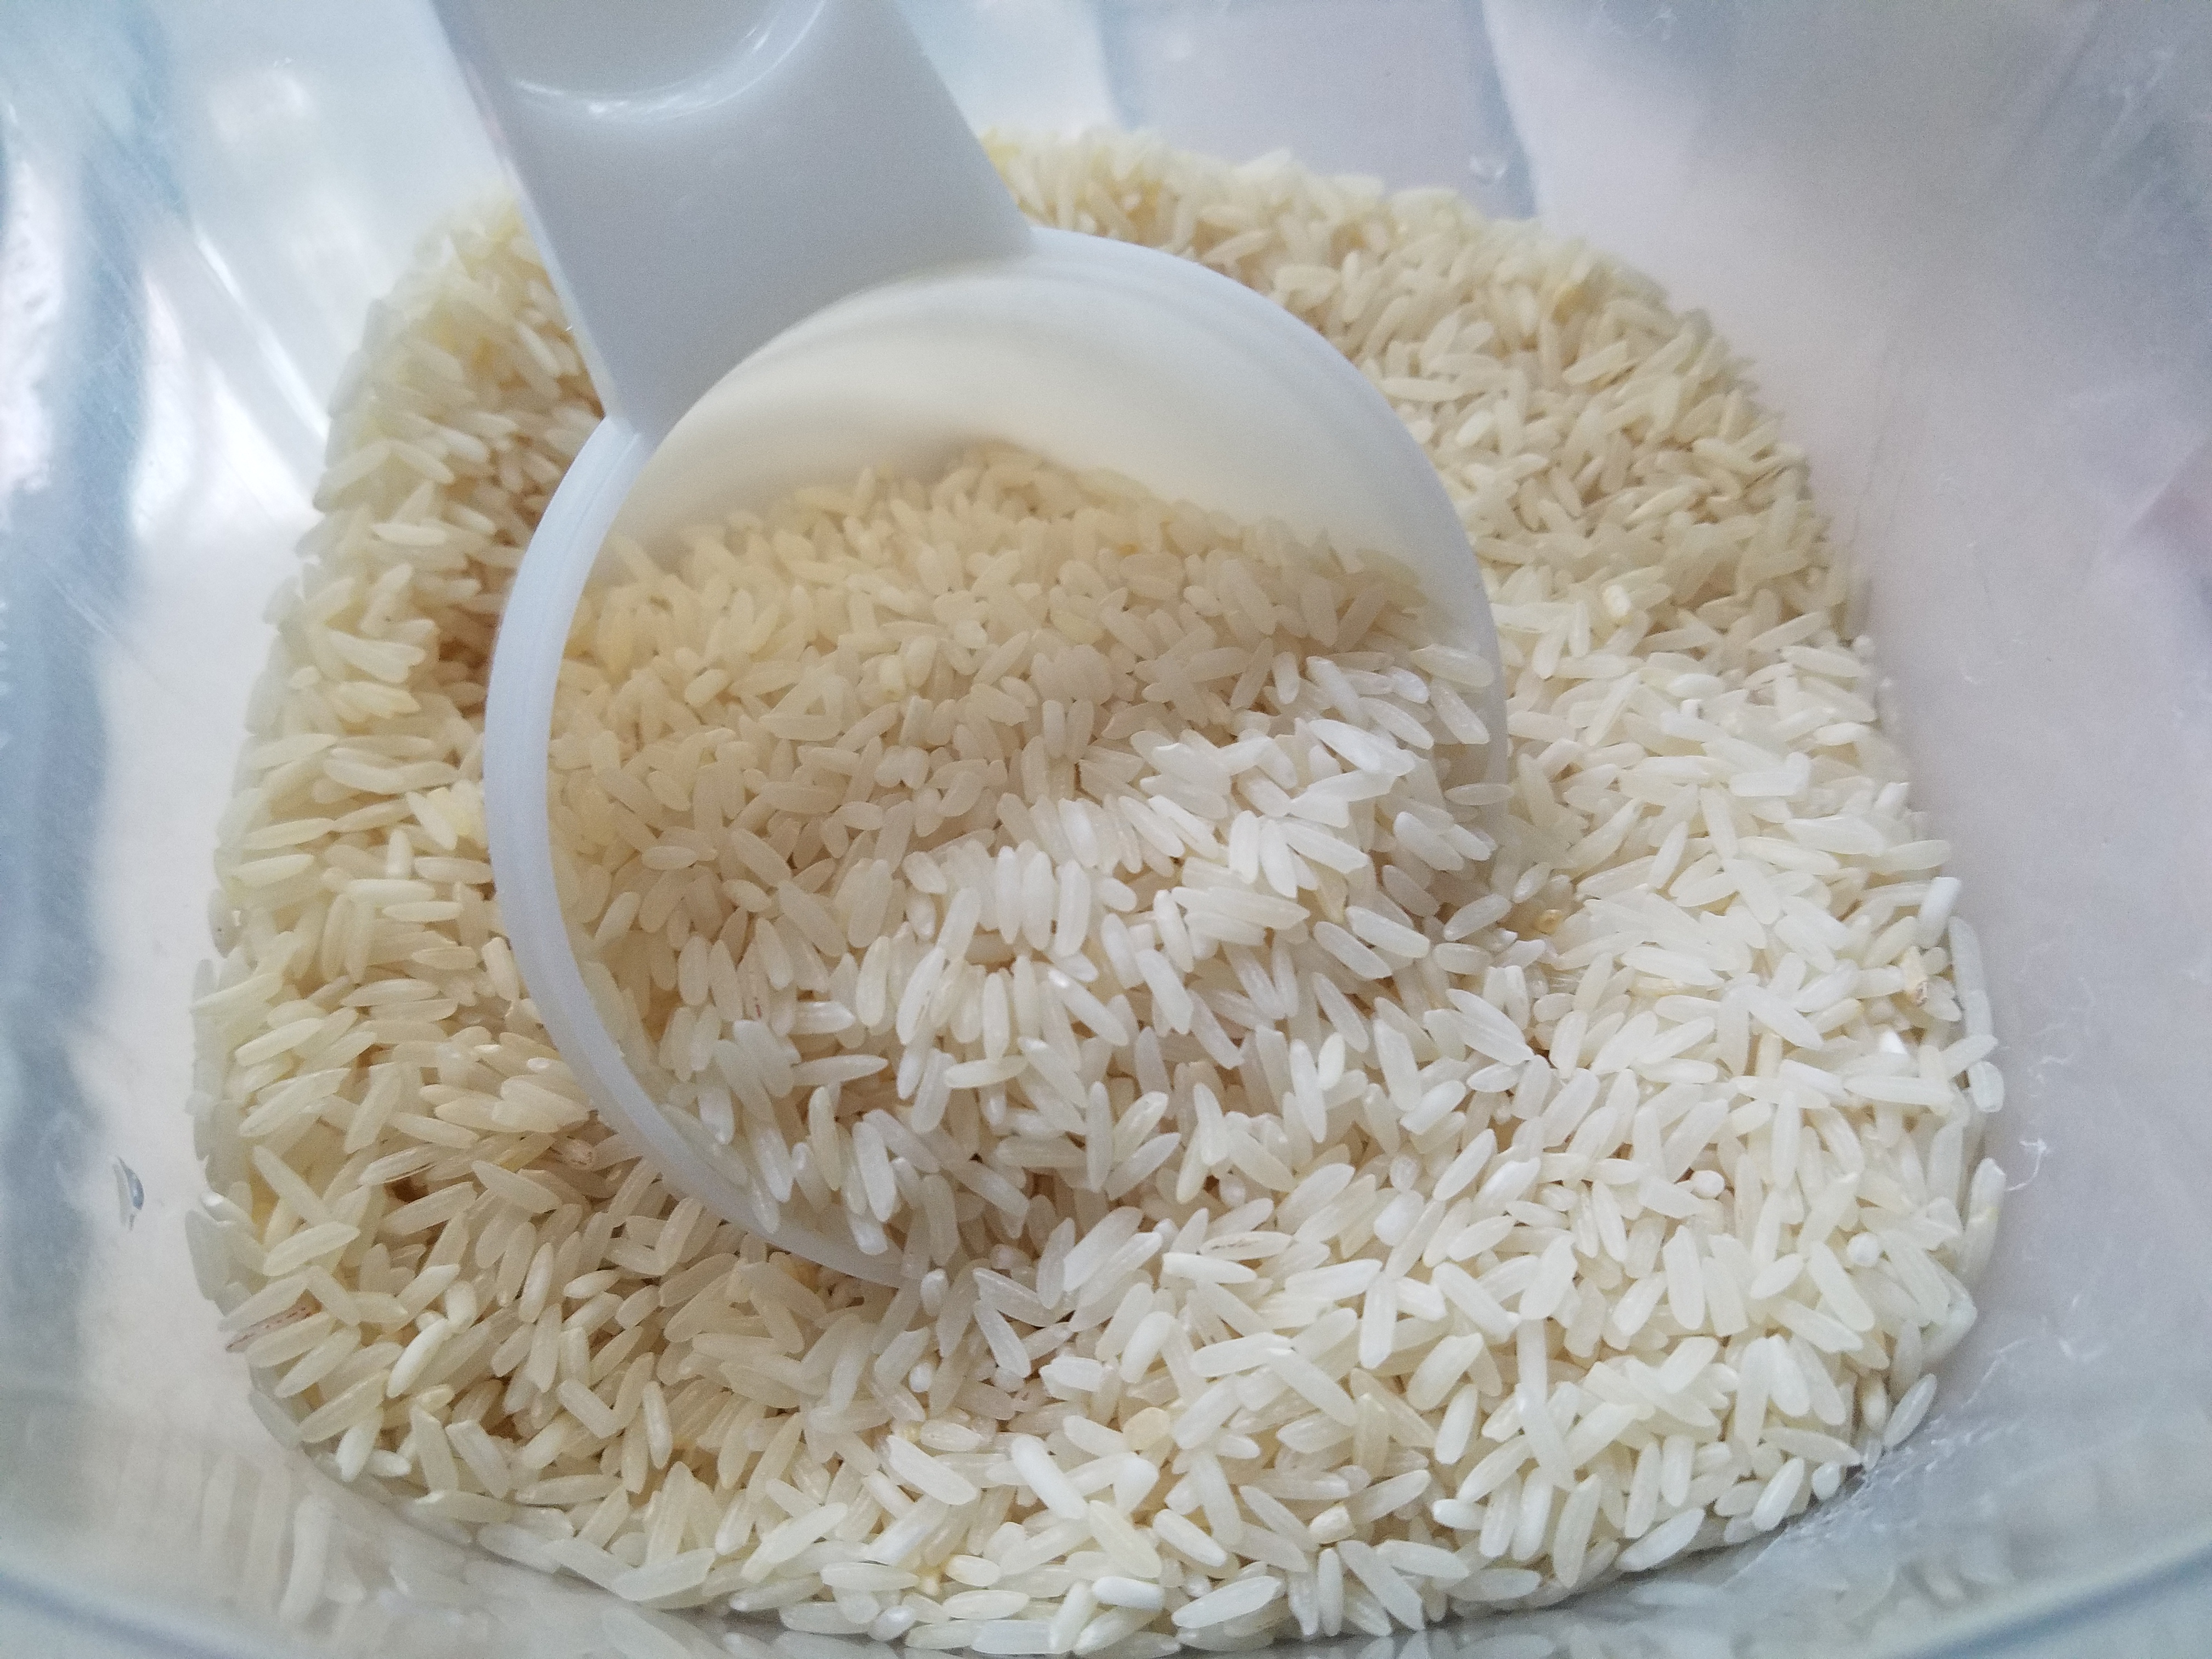
Arroz.
Y frijoles.
Now, if you don’t have the kitchen blessing that is a rice cooker, you’re still good to go. You can use a saucepan on the stove top. Yes, this may be the easiest, better-tasting, restaurant-replica recipe you have ever made.
What kind of rice do you need? Whatever you have on hand. I had a blend of brown and white.
What kind of beans? Well, for this recipe, classic black beans. And yes, canned is just fine (though I’d recommend low or no-salt added to have better control of the sodium in your recipe).
Grab a handful of other ingredients – like fresh cilantro, onion, extra virgin olive oil, and lime – and you’re basically good to go.
Mmmmmmmmmmmmmm yas.
The bigger plus? This recipe makes at least 6-12 Chipotle portions if you get their rice bowl… and it costs less than one or two orders.
By the way, you can find an amazing tex-mex bowl recipe (along with tons of helpful info) in one of my best-selling books, the grocery store tour guide, which is also available as an ebook!
Without further ado – here it is! Try it out, share, and let me know what you think :)
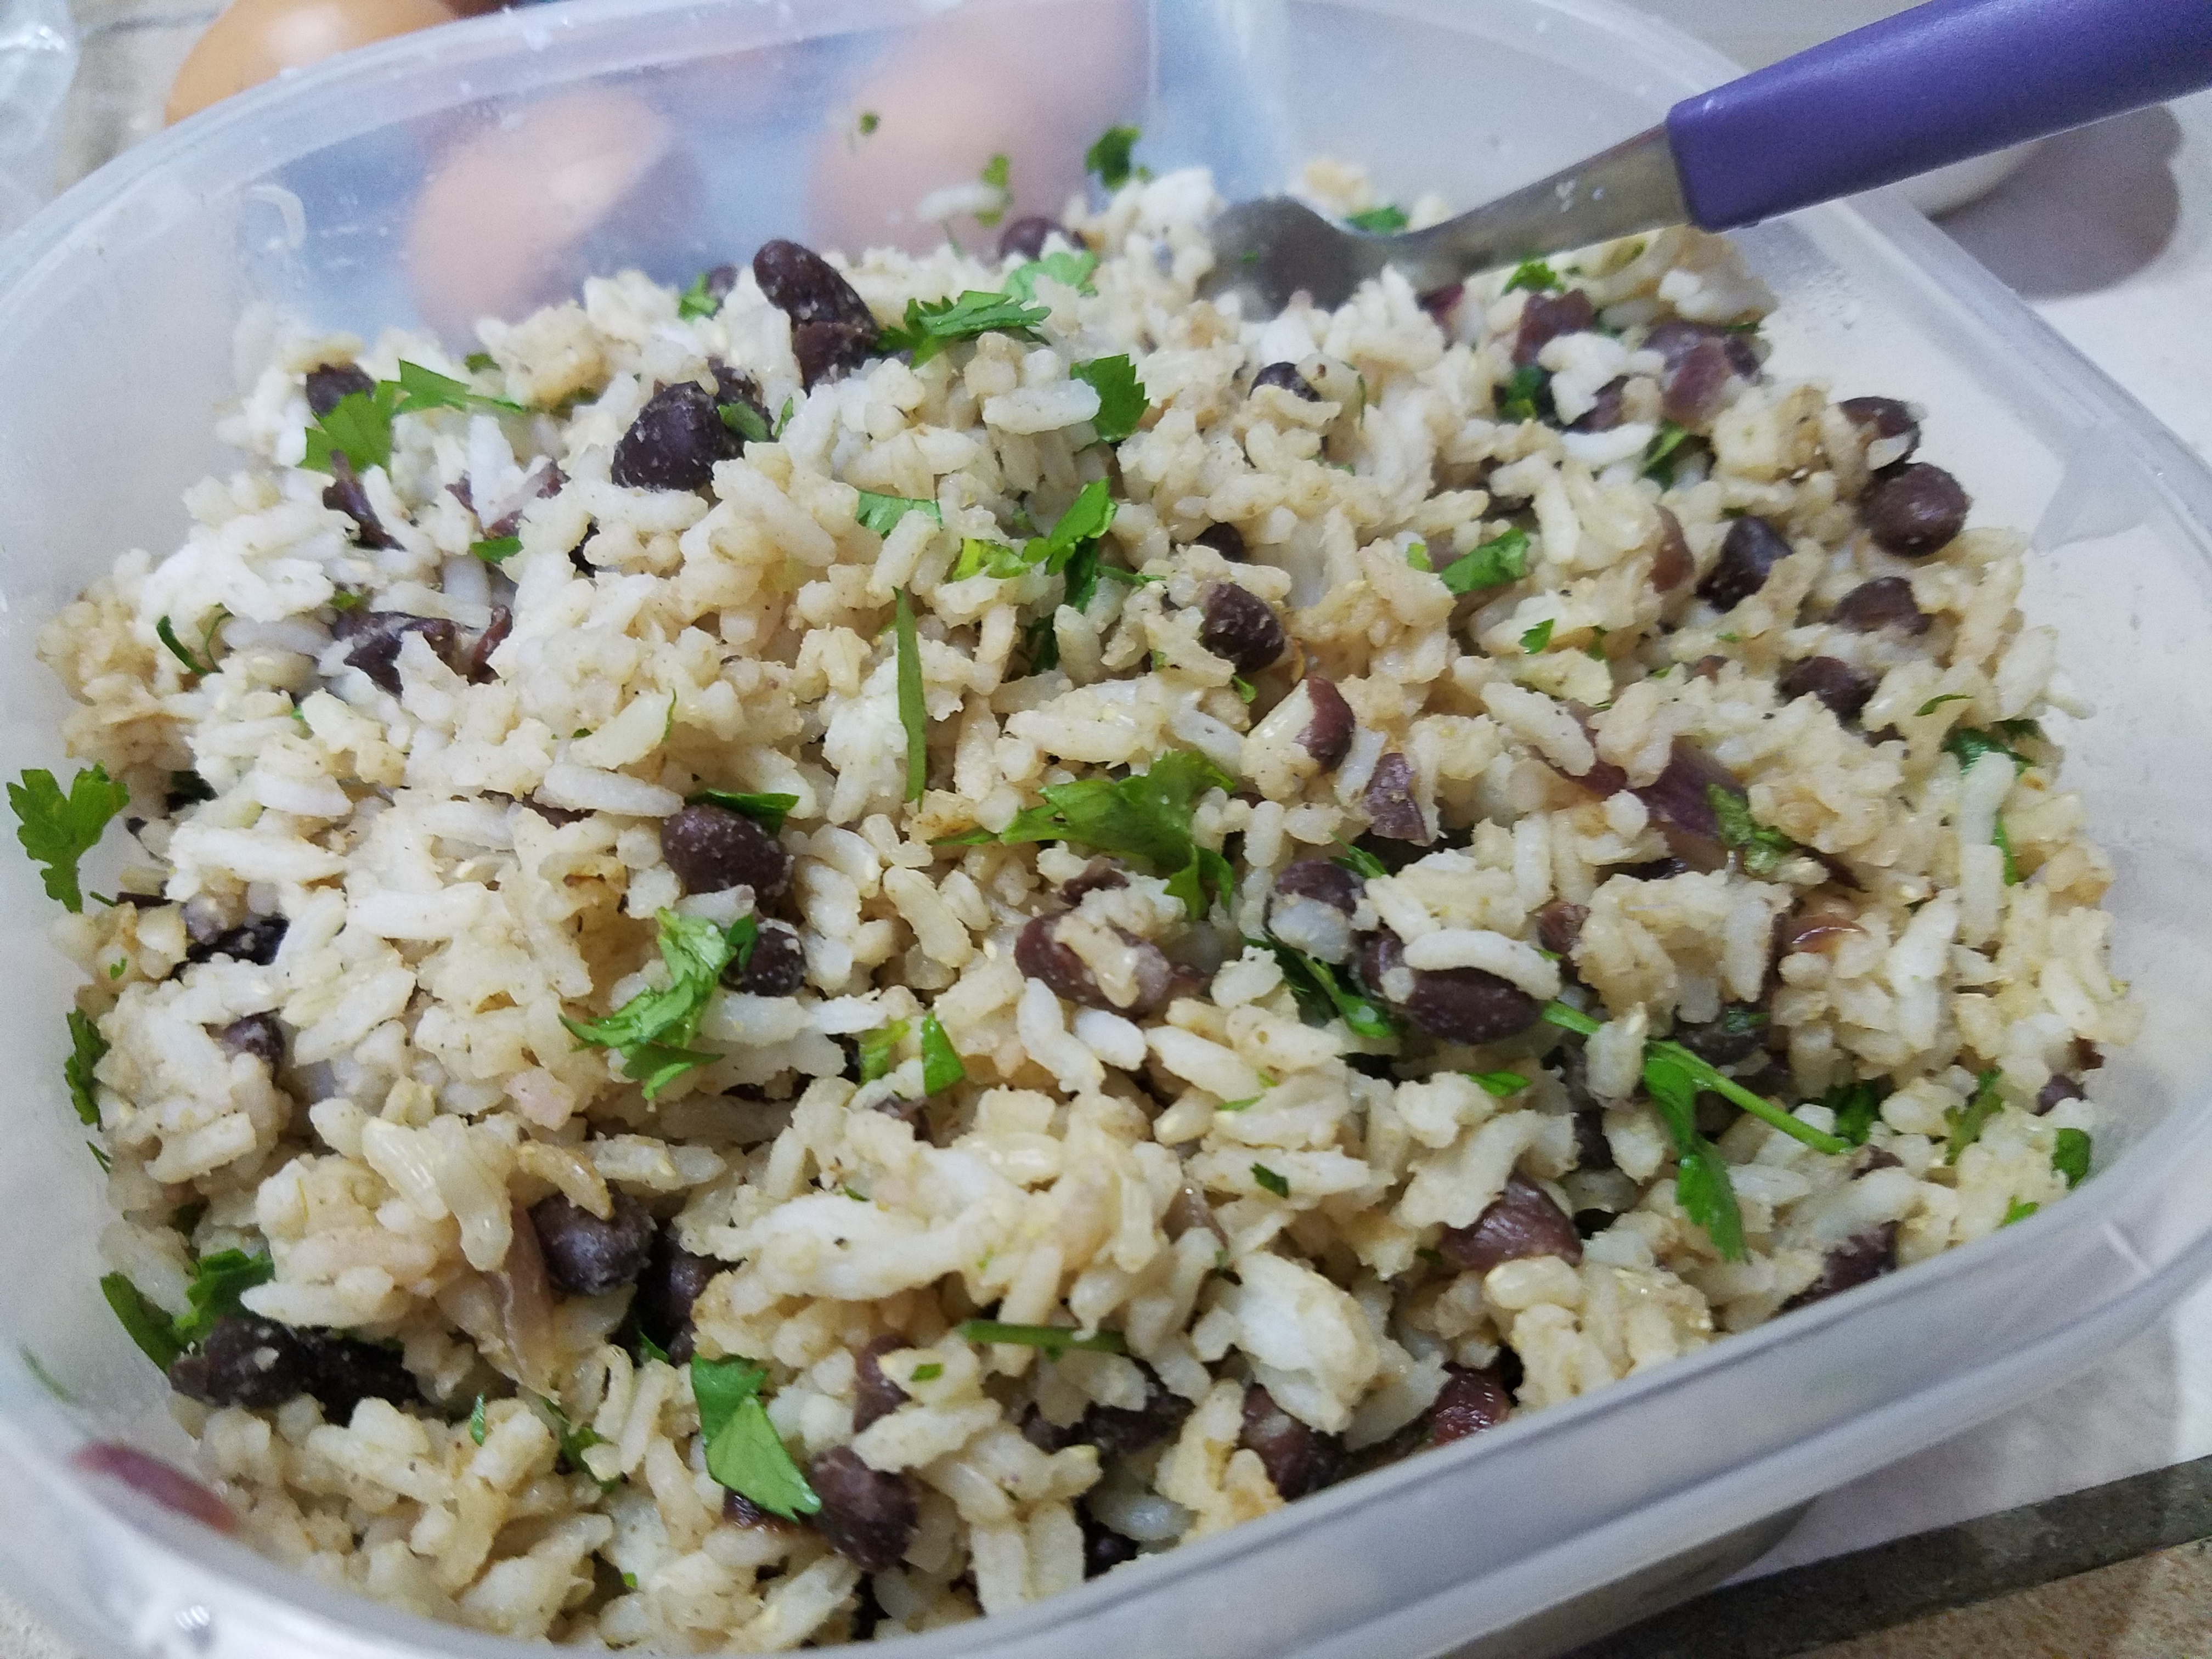
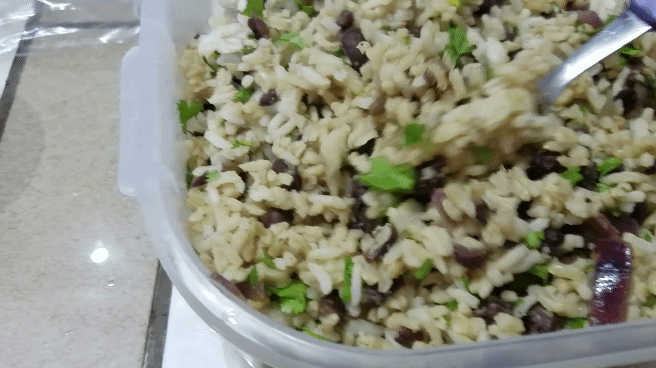
CILANTRO LIME RICE & BEANS (makes around 6 cooked cups)
2 cups brown and/or white rice (before cooking) *cook according to packaging or using leftover rice is fine!
Half a large red onion, finely chopped
1 Tbsp Extra Virgin Olive Oil
1 (~8 oz.) can of Black Beans (preferably organic and low or no sodium to better control salt content), drained and rinsed
1 small bushel of fresh cilantro, leaves picked and chopped (about 1/3 cup chopped)
The juice from one lime
1 tsp. ground cumin
1/4 tsp. sea salt (or more, to taste preference)
1/4 tsp. black pepper (or according to taste)
Directions
Cook rice according to package or use leftover rice. Two uncooked cups yields 4.5 to 6 cooked cups.
In a fairly large saute pan heated at medium to high, saute onions in olive oil until fragrant and softened (about 2-3 minutes). Add rice and stir, letting cook for another 2-3 minutes.
Add black beans, cumin, salt, and pepper. Stir to all incorporate. Lower heat to higher “low” spectrum, cover the pan, and let flavors marry for 3-4 minutes. You can also add 1/4 cup or so of water before covering, especially if the rice was leftover. This will add more moisture while cooking.
Uncover and remove from heat. Stir in lime juice and cilantro, then taste and add more salt if necessary. Stir again and then ENJOY! :)
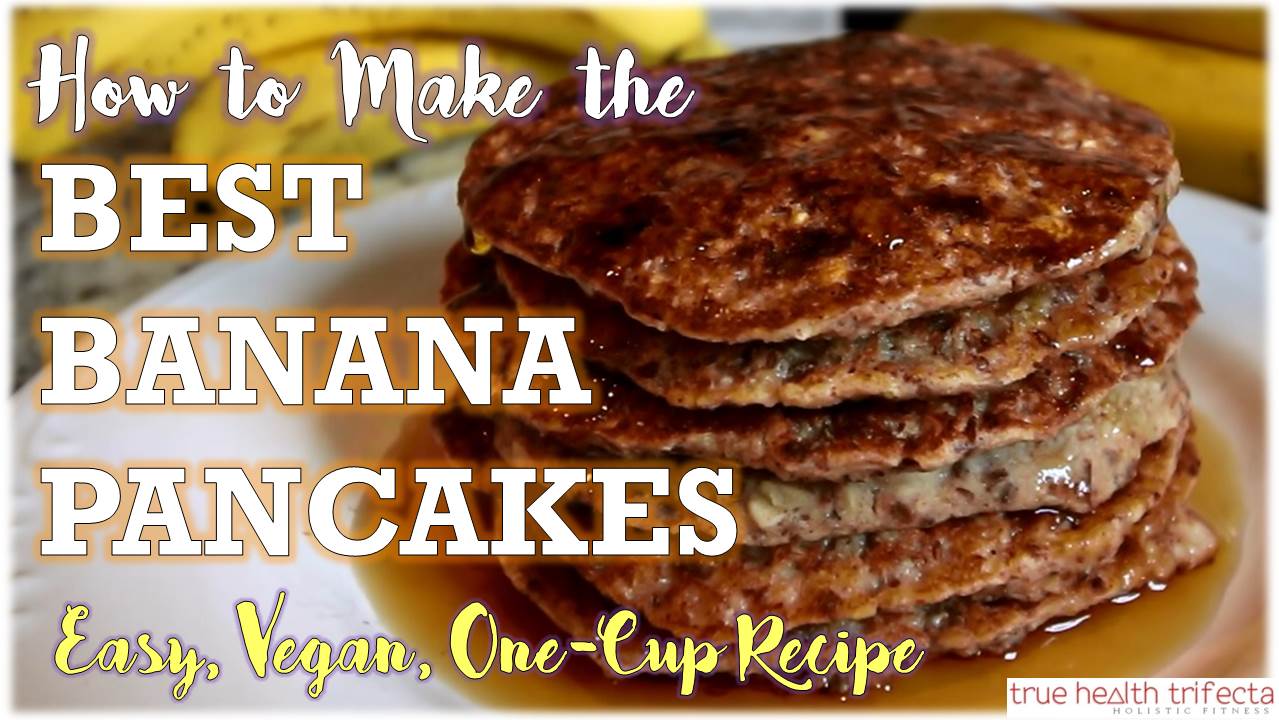
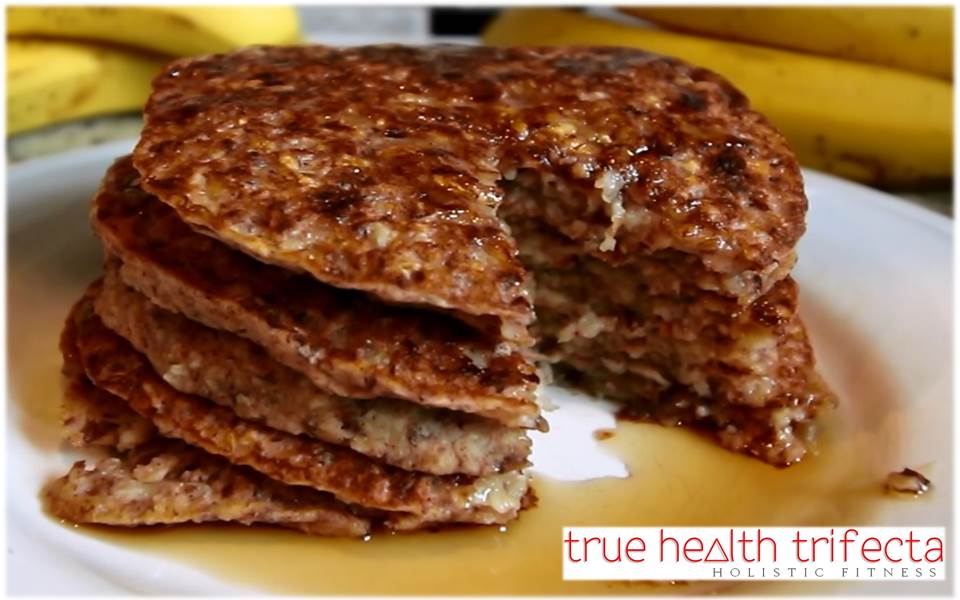
This is one of my GO-TO recipes for the easiest, most delicious, minimal-ingredient Banana Pancakes ever…
I have this almost every morning with my “moon egg” (if you don’t know what I’m talking about, check out this video: https://youtu.be/pNkGUw9HPNE).
These Banana Pancakes are not only moist and delicious, but also happen to be vegan, gluten free, and sugar free (for you fans of the “free’s” out there) while being very fiber- and nutrient-rich. Not to mention, crazy flavorful!
½ cup Quick Cooking Oats, pulsed in a blender or food processor to be semi-ground
½ tsp. Baking Powder
Generous sprinkle of Ground Cinnamon
A pinch of salt
DIRECTIONS
Get out a 2-cup Liquid measuring cup, like this one I use in the video and a mini-spatula or fork. Put all of the liquid ingredients in the measuring cup (measuring as you go), stir, and let sit for a few minutes.
Take half of the banana and break it apart with your fingers as you add to the liquid ingredients. Then take a fork and mash/mix it in until larger chunks are gone.
Add in all dry ingredients, mixing well. Add more almond milk (typically ¼ to ⅓ of a cup) until it is more of a moderate batter consistency – not too thin, but not thick. Allow the batter to thicken by letting it sit ~5-10 minutes.
Preheat stove top to medium heat (I typically go to level 4). Once pan is heated, spray pan with coconut oil spray. Give batter a quick stir and pour in about ¼ cup per pancake.
Set a timer for 3 minutes, then flip. Pancakes should be a light golden brown. Let other side cook another 3 minutes.
This makes 4-6 pancakes depending on your size. I like to pour a little maple syrup on the side and dip them, but you can also stack ’em up pretty and pour maple syrup on top! Feel free to slice up the other half of your banana to top them off, too!
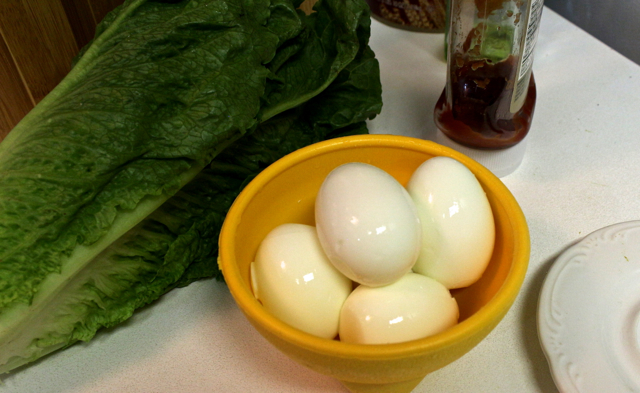
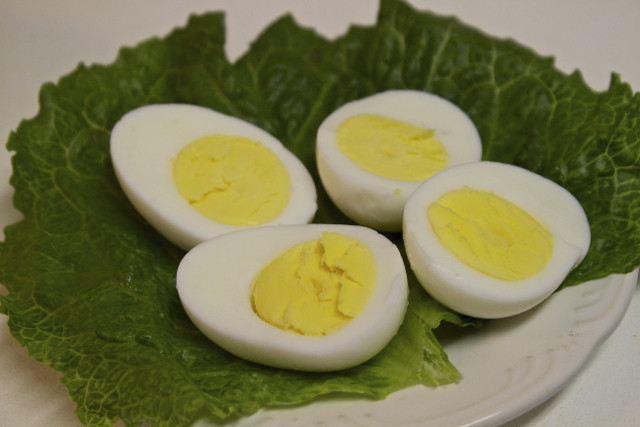
I absolutely LOVE eggs. Always have, always will. Whether they’re scrambled, sunny-side-up, chopped over a salad, or even straight out of the carton (whites, in that case. And no, it doesn’t taste like foot. It’s tasteless and awesome)… Eggs have always been a staple food in my regime of deliciousness.
Cadbury Creme Eggs were even my favorite holiday treat growing up, for goodness sake. Side note: Are you aware they have actually decreased 30% in size since back in the heyday? Truth.
I partly hold this on account of my dad and the memories of him making his yummy breakfasts of eggs, mushrooms, cumin, and close to a half-stick of butter in a pan. I always wanted whatever he was making because it smelled so warm and spicy. Plus, he always ate everything with Lebanese pita bread. Believe it or not, the pita and butter was my favorite part… I just kind of put up with the eggs (reminder: Nutrition Specialists are not born Nutrition Specialists) and I could still hear my mom saying, “That is TOO much butter for her! Way too much,” to which he would say okay and then slice me off another chunk of golden, melty goodness when she wasn’t looking.
Coincidentally, I really miss my dad about now… and the thought of that much butter at this point kind of makes my stomach turn. But, I digress.
When it comes to the most convenient form of eggs – hard boiled – there is actually a LOT more involved then throwing eggs in a boiling pot of water and then peeling them after a few minutes. It’s a SCIENCE, and if you don’t have it down, you’ll likely experience one (or all) of the following hard boiled fails:
Tearing and peeling half the whites off with the shell. I call this the Moon Crater fail.
Success with peeling… but a puke green rim (or totally green, for that matter) yolk on the inside. Aka: the Groke.
A yolk that isn’t completely cooked and still runny (which is on purpose, at times, ie. the soft boiled egg).
A cracked or broken shell while boiling which ends up in seeping out whites and tumor-growth looking eggs.
(Add your hard boiled egg fail here)
It came to my attention recently that so many people don’t know exactly how to make the perfect hard boiled egg. Whenever anyone asks me what a good, portable, convenient option is for a snack, one of my go-to suggestions is this winner. However, 9 out of 10 people say they can never make them right! As soon as a couple of clients mentioned spending way too much money on a way questionable means of this amazing, protein-packed snack (*cough* 7-11 ready hard boiled eggs in a plastic baggy), I KNEW I had to share this post to benefit their bellies and everyone else who fears attempting the delicousness that is the HBE.
I’m pretty happy to say I have it down to a science and am even happier to share it here!
HOW TO MAKE THE PERFECT HARD BOILED EGGS
You’ll need:
Eggs
Water
Large sauce pan with lid
Large slotted spoon
Large bowl
Ice
As an example here, I’m using a small saucepan and just a few eggs. But I highly suggest making these in bulk and using the biggest stock or sauce pan you have because you want to make sure the eggs are covered by a good inch of water without it boiling over once things get moving. Plus, it’s amazingly convenient to have a bunch of them ready to go in the fridge, especially if you don’t have time to prepare food during the day and need a quick snack (or protein for a full) to grab and go.
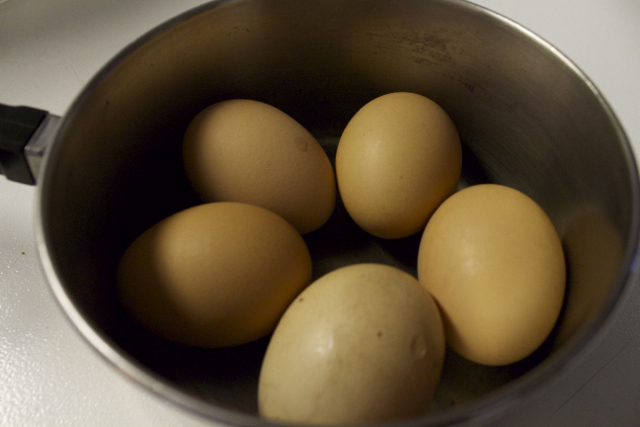
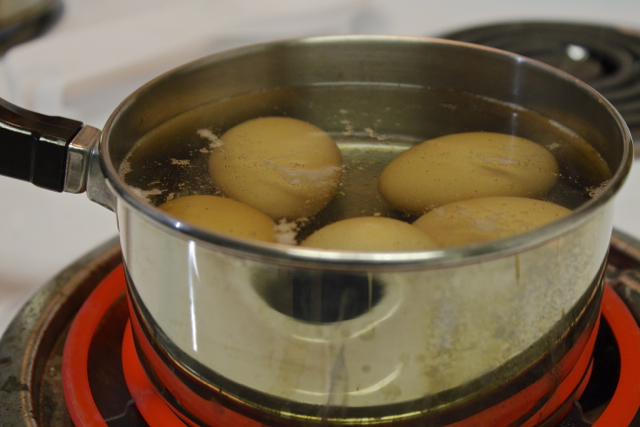
Step 1: Carefully place cold eggs in a single layer at the bottom of your sauce pan.
Notice the bottom egg is a little cracked. At the end, I share a tip that helps salvage the whites if they seep out while boiling.
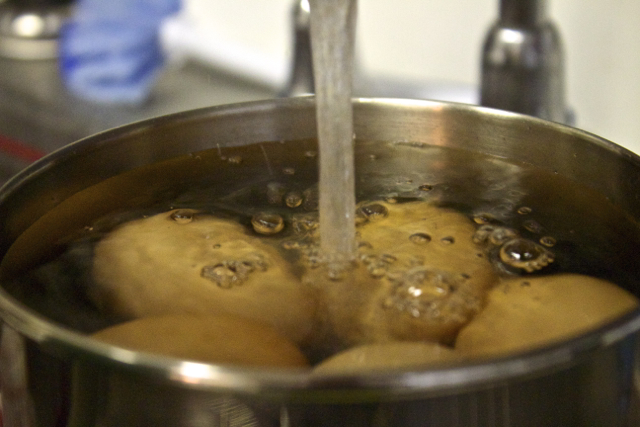
Step 2: Fill the sauce pan with cold water until all the eggs are completely submerged (about an inch of water above eggs).
Step 3: Put sauce pan on stove and set it to high to boil.
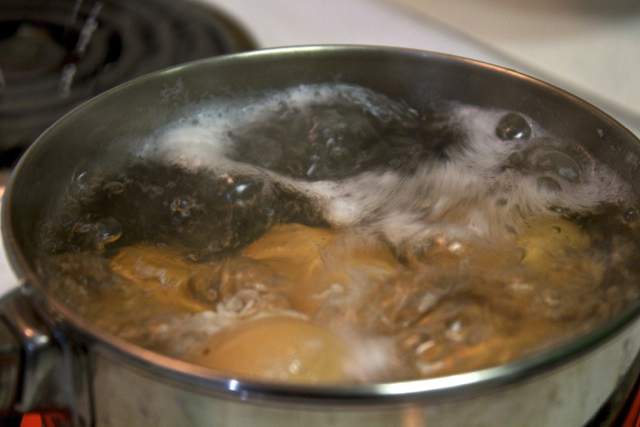
Keep a good eye on it because it won’t need to boil for long…
Step 4: Once water gets going with a rolling boil, let boil for only one minute before removing from stove top.
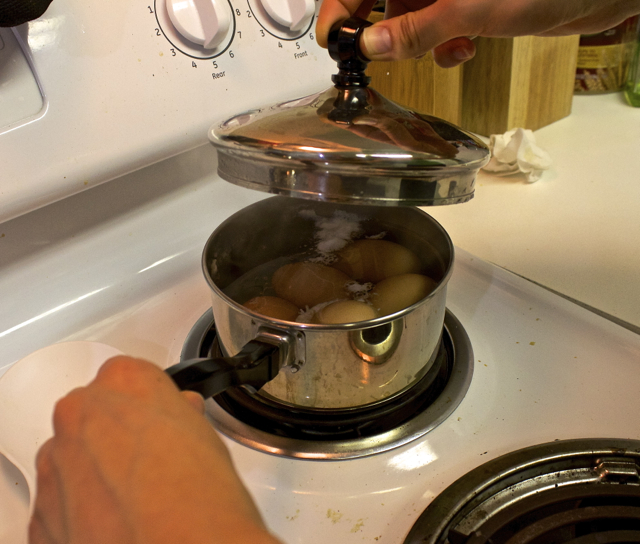
Step 5: Cover with lid and take off the burner, setting it to the side
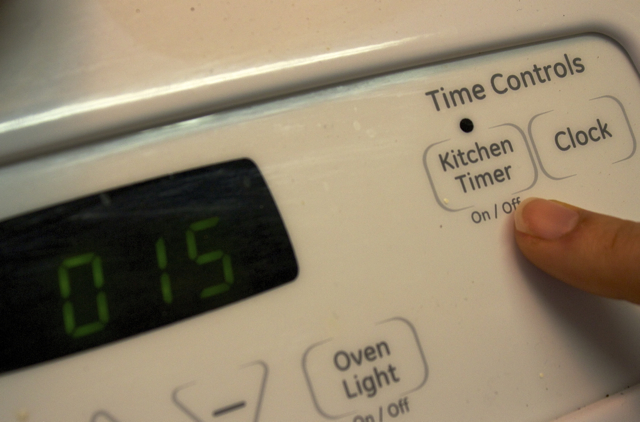
Set a timer for 15 minutes. The eggs will continue cooking in the hot water as they sit.
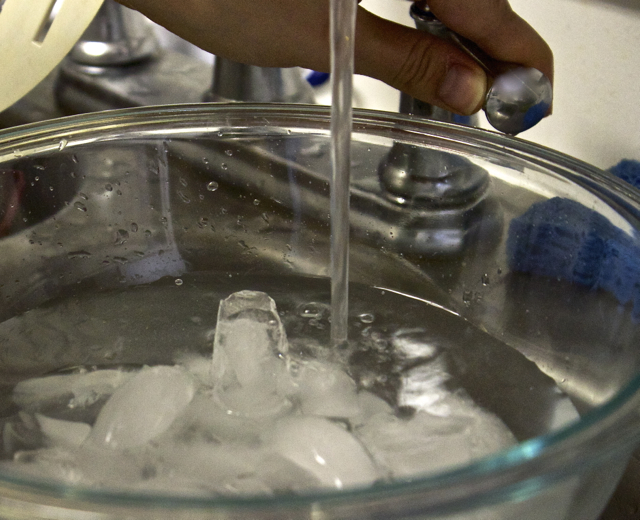
Step 6: Fill up a large bowl halfway with ice and then up about 3/4 high with cold water
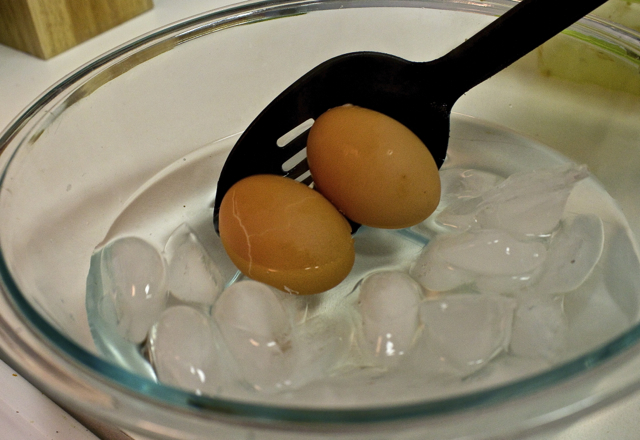
Step 7: Once timer goes off, use a slotted spoon to remove eggs from sauce pan and place in ice bowl.
Let sit about 10 minutes, until ice is mostly melted down.
Can you guess which egg is the one that had the crack in it?
Now. Time for things to get serious.
You’ve made it this far, peeling glory is soon ahead.
And what would an instructional post be without a little video for the visual people?
Main tricks are:
Have water handy for rinsing (and even peeling under). It will help the shell slip off.
Tap both ends of the egg gently on a counter, then do a gentle “rolling’ motion to break it all around before peeling off (this REALLY helps!)
Use the side of your thumb to gently glide the shell off (as opposed to nails or the tips of your fingers). This alleviates risk of tearing any whites off with the shell.
Organic, brown eggs are harder to peel than regular, white eggs. Basically, the fresher the egg, the harder to peel. I definitely suggest and prefer organic, free range eggs if you plan on eating the whole thing including the yolk-y goodness. But if you mainly just want the whites, it will be easier on your prep (and wallet) to just get regular white eggs.
Try not to eat them as you’re peeling. At least not all of them. Yummy little health balls they are.
Additionally, if for some reason an egg cracks in the pot and whites start seeping out (like one of mine did because it had a slight crack in the shell before putting in), have some distilled white vinegar handy and throw a splash or two in the water as it begins to heat up. This helps the white coagulate faster and works well to salvage the egg.
Food for thought: Do you feel like hard boiled eggs make you bloated and gassy?
There is actually justification for this. Eggs (particularly the whites) are very high in sulfur… what most people familiarize with the “rotten egg” or Florida sprinkler system smell. Sulfur is a beneficial nutrient and one of the reasons eggs are a great super food. Any time eggs are cooked, the sulfuric compounds in the proteins are broken down and hydrogen sulfide is released (the cause of that smell). In the case of the HBE, however, this hydrogen sulfide has nowhere to really go. The green rim around the yolk from “overcooking” is actually a reaction between the ferrous iron in the yolk and the hydrogen sulfide in the white (yay, science)!
Some people poke a tiny hole with a very small needle in the shell of the egg before boiling to release pressure and claim this eases any digestive upset caused by the broken down proteins.I’ve never noticed any digestive issues regarding HBE’s personally, but it may be worth trying if you’ve had this issue! People also claim that poking the tiny hole encourages more even cooking, making the eggs easier to peel. But, as you can see once you try my method, a hole isn’t necessary for super hard boiled success!
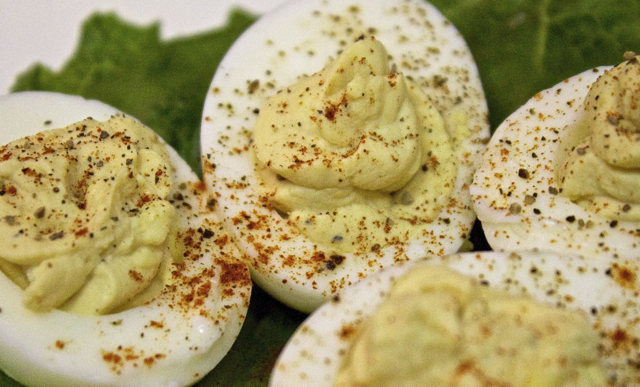
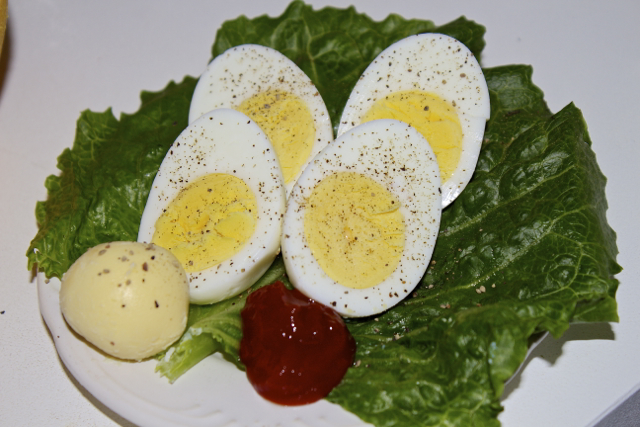
Now time to go enjoy them however you like! My preference is simple with a bit of sweet and tangy homemade ketchup :)
Now that you know how to cook them up, what is your favorite way to eat hard boiled eggs?
If you haven’t already, please take a moment to read and sign the petition at the page linked above. Also, like our page on Facebook to get updates and, as always, share with your friends. As of right now we are at nearly 1200 signatures… and the initial goal was 1000! The new goal is to keep on obtaining as many signatures and as much support as possible to have this lovely, health-happy petition ready to send out in the first week of December. I don’t know about you guys, but I feel really awesome about this. We are definitely proving to be a strong force of a community that knows the benefit of healthful, affordable eating. I honestly couldn’t be more excited and grateful for each and every person backing this little idea I had a few short months ago. I’ve said it a hundred times, but each of every one of you are more awesome than you know.
In other waaay less exciting news, I’ve updated a few different pages on this site (including the About Us, Personalized Services, and Links & Love tabs) and invite you to browse around and check things out. I will be the first to admit I’m no graphic designer or webmaster, so if things aren’t aligned or formatted correctly, it’s definitely a work in progress! I may even change the entire design of the site to make it easier to navigate and more appealing. If you have any suggestions, definitely don’t hesitate to contact me as I am always open to new and improved ideas from those who are actually web-design savvy! :)
Besides that, I am making it a point to have at least one weekly blog post beginning now. Get ready for new recipes, interesting research finds, entertaining pictures, my venture updates, contests/giveaways, and other random thoughts I can’t help but share. One thing is for sure, I hope to brighten your day, encourage contemplation, and share love with each and every one of you.
By the way, is Thanksgiving Live! on Food Network the equivalent to the Super Bowl to anyone else, or am I just that much of a culinary nerd? Coincidentally, I came across this today…
Personally, my reaction involves more drooling less yelling.. But you get the idea..
Everyone have a wonderful Thanksgiving and thank YOU for all you do, because you ARE amazing!
 Arroz.
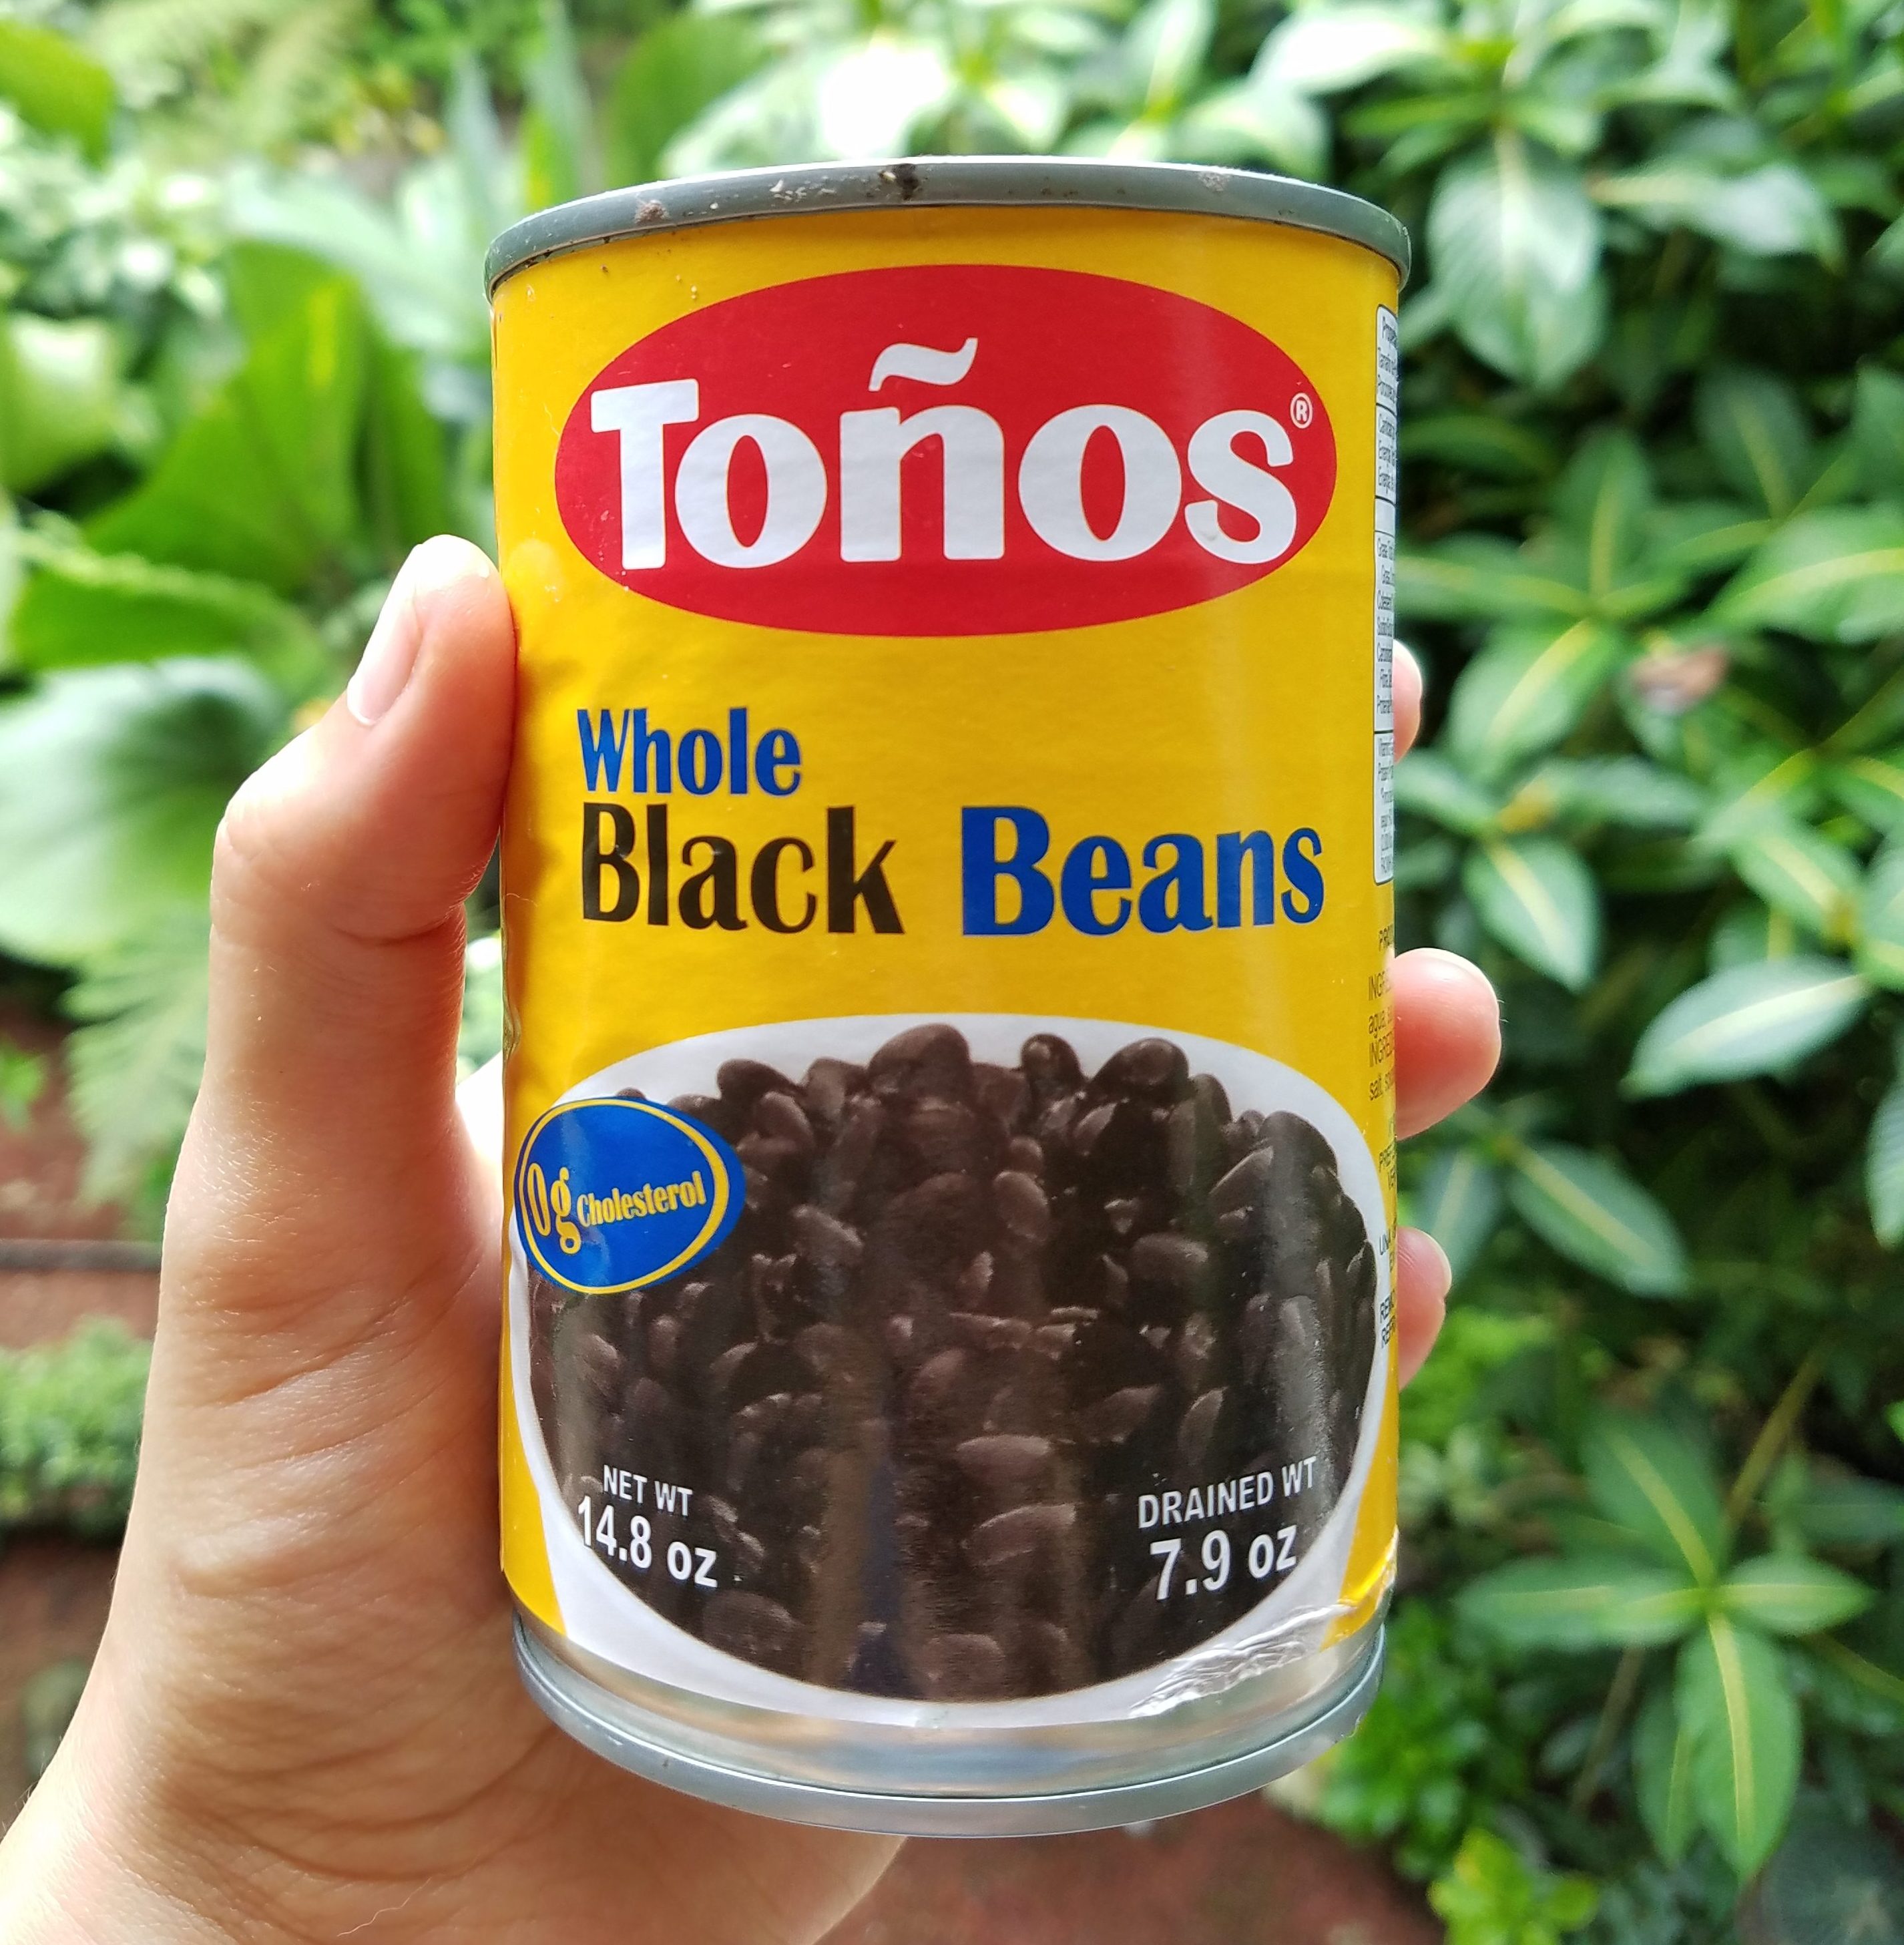 Y frijoles.
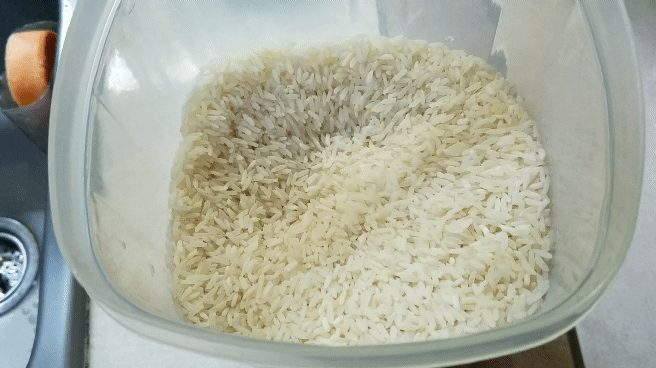
 Mmmmmmmmmmmmmm yas.