Category: Travel

Kale & Quinoa Bowl: Easiest, Filling, Nutritious Go-To Meal (RECIPE)

I introduce you to my latest obsession:


Nom nom nom....


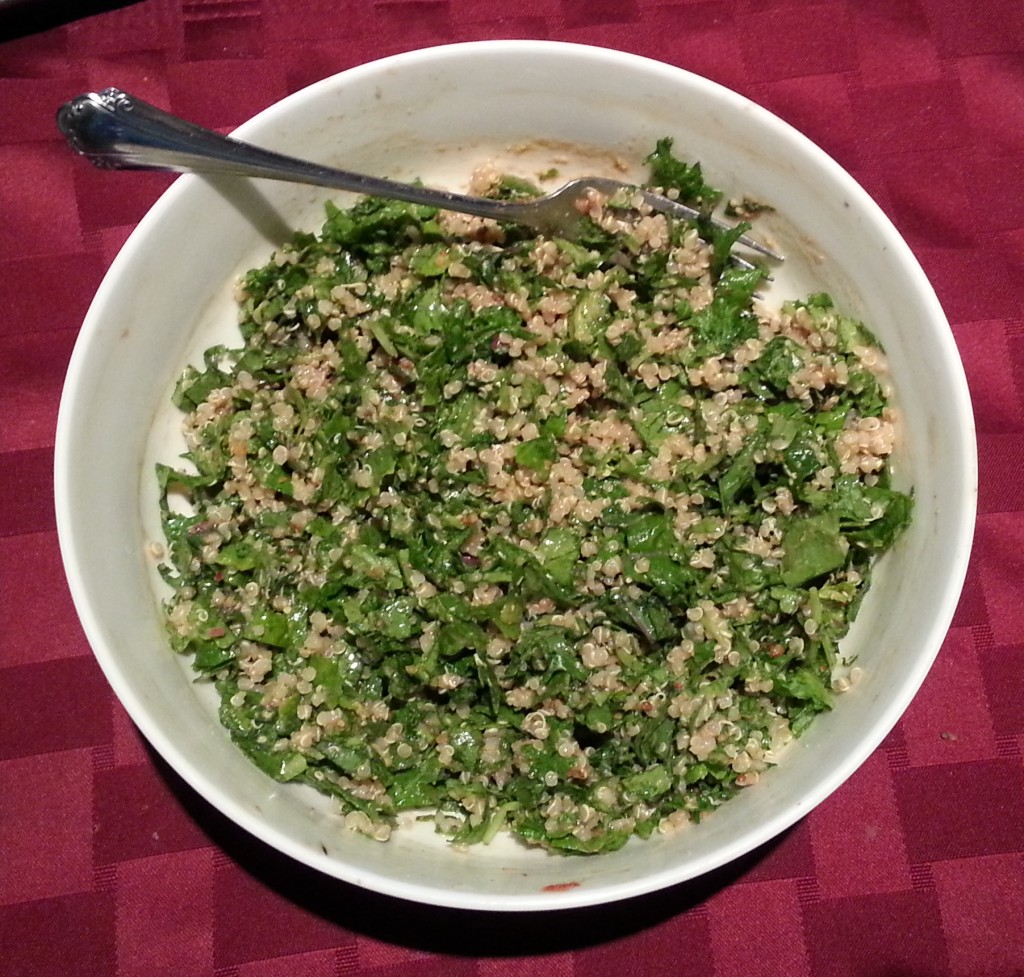
You can’t really tell by the picture, but that bowl is HUGE and it’s holding 1 cup of cooked quinoa and 100g of chopped kale… along with an insanely delicious dressing that I will share below. This simple whole food duo is the perfect, delicious, filling, hearty base for so many different things – the list is nearly endless.

You can go savory, sweet, or spicy; you can add everything from more vegetables like tomatoes, cucumber, zucchini, or pumpkin – to fruits like chopped dates, figs, berries, or apples.

Another super bonus? If you’ve put yourself into a nutritional category box – I bet this fits into it. It’s all the “free’s” (Gluten-free, Dairy-free, nearly fat-free, egg-free) and all the “friendly’s” (Paleo-friendly, Vegetarian–friendly, Vegan-friendly, Carb-friendly, Allergen-friendly).

And when it comes to macro-nutrient ratios, this particular serving size has:

272 Calories

11g Protein

39g Carbs

5g Fat

7g Fiber

56g Sodium

Adding even more benefit? Both of these foods are incredibly nutrient dense in not only the macros above, but the micros such as: tons of anti-inflammatory phytonutrients, vitamins and minerals ranging from B-vitamins to Vitamin E and zinc, body-loving fibers, and more.

Basically, quinoa and kale are soul mates in my book.

Like I said, there are ENDLESS directions this two-ingredient base can go; but let’s start with one of my favorites these days…

Creamy Southwest Spice Dressing

Ingredients:

  • 2-3 Tbsp Lemon Juice
  • .5 to 1 Tbsp Extra Virgin Olive Oil
  • 1 heaping tsp Tahini (sesame seed butter, in Middle Eastern section of most markets)
  • 1 Tbsp Dijon Mustard
  • 2 tsp Mrs Dash salt-free Southwest Chipotle Seasoning
  • 1/4 tsp Himalayan Sea Salt (I just fresh grind in to taste)
  • 2 Tbsp Balsamic Vinegar
  • 1 Scant Tbsp Garlic Powder OR 2 cloves minced garlic
  • 2 tsp Onion Powder OR 2 Tbsp minced red onion
  • Freshly Ground Black Pepper (to taste… I like quite a bit)
  • Half a dropper of liquid Stevia, OR 1/2 Tbsp honey, OR 1 Tbsp Stevia in the Raw

Directions: Put it all in a bowl, whisk together, and toss with quinoa and kale…. That’s it. (Hint: make ahead of time by at least 30 minutes to let the flavors all soak up and merry. Nom!)

I always have a few cups of cooked quinoa in the fridge that I prepare in bulk in my rice cooker, one or two days a week. As for the kale, get 2-3 BIG handfuls, remove any stems (they tend to be a bit bitter sometimes), and chop up well before tossing.

Coming soon:

The True Health Trifecta Nutrition & Recipe Book:

Simple Salads, Soups, Sauces, & Dressings Edition!

This is turning out to be the perfect collection for everyone; from those beginning their health and fitness journey, to those well on their way and looking for new, EASY, healthy go-to meal ideas!

It will include TONS of crazy-easy yet healthy recipes like the one above; plus photos, nutritional facts & tips, kitchen & pantry basics and recommendations, my Macro-Nutrient Cheat Sheet, Pre- and Post- workout meal ideas, Soups, Salads, Dressings, and more!

Not to mention, unless you are allergic to a specific food, this book is EVERY-diet friendly! So whether you have put yourself in the Paleo box, Vegan category, High-carb-low-fat, Low-carb, Gluten-free, 80/10/10, intermittent fasting, carb-cycling… I purposefully made this a compilation of nutritious options that can be enjoyed by the majority of dietary lifestyles out there!

And, I know most people don’t have the time or interest to become the next Iron Chef in the kitchen… especially with the hustle and bustle of every day life. That’s why I made sure the recipes and tips in this book aren’t incredibly elaborate or time consuming. These are some simple basics to help anyone successfully achieve their goals without spending hours preparing and while getting in nutrient-dense foods that taste flipping amazing.

Can you tell how mega excited I am to be putting this together for you guys?! :)

Make sure to sign up for the newsletter and like the True Health Trifecta Facebook page for word on when it is available for sale in the shop! :)

Homemade, Healthy, EASY Doggy Treats! (RECIPE)

Meet Athena…

  IMG_1133-1 IMG_1131-1 IMG_1136-1

She was less than 3 months old in the photos above, but recently came upon her **drum roll**  1st birthday! As much as I’d love to say this adorable furry creature is mine, she is the four-legged baby of one of my awesome local clients… but that doesn’t mean her birthday goes without a celebratory gift.

20140807_184242

Being the impulsive baker that I am, I took this opportunity to whip up some birthday treats (my first attempt at baking for the canine kind) that ended up turning out pretty amazing according to Athena’s reaction, shared here via her Mommy’s review:

Email Subject: Four out of four paws rating

“I put the A and W on a plate for her and she snatched up the A before I could get a pic! She took it in to the dining room, ate it in a flash, then went back for the W. After it was gone, she went back looking for more. But she’ll have to wait!

Thank you so much. That was extremely thoughtful of you. She LOVED them. Usually she sniffs a new treat a few times and mouths it a bit before eating it. Not yours. She ate them right up. She could tell right away they were awesome.”


photo 1(1)   photo 3

photo 2(1)   photo 4

Nothing like having your culinary prowess validated by multiple species! WIN.

With a review like that and actually remembering the recipe due to it being so crazy simple, I definitely thought it was worth sharing with the vast population of doggy lovers out there. So, here you go!

Healthy, EASY PB-Sweet Potato Doggy Treats!

  • 2 ½ cups whole wheat or all purpose flour
  • 2 eggs
  • 1 jar of Sweet Potato baby food (ingredients should only be sweet potato + water)
  • 1 Tbsp Black Strap Molasses (or honey)
  • ¼ tsp salt (I used Pink Himalayan)
  • 1 tsp ground cinnamon
  • 2-3 heaping Tbsp smooth Peanut Butter
  • Chicken Stock or Broth (or just water works!)
  1. Pre-heat the oven to 350 degrees.
  2. Mix all of the above ingredients (except for the chicken stock/water) in a bowl until it’s all incorporated well.
  3. Add in chicken stock/water to get the desired consistency (it should be a somewhat “dry” dough that you can roll out… you honestly may not even need any extra liquid).
  4. Sprinkle a bit of flour on a flat surface and flop the dough over from the bowl.
  5. Roll it out to be about 1/2 inch thick, and use cool cookie cutters like these (or your free-hand shaping skills like I did!) to form the cookie shapes.
  6. Place on a cookie sheet and bake for about 45 minutes, or until cookies are lightly browned on edges and a bit stiff.
  7. Take out and let cool on a cookie rack, or you can just turn the oven off and let them cool in there! (They will harden up a bit as they cool, getting that doggy biscuit kind of feel; so don’t worry if they seem soft when they are freshly done baking.)

Then again, I’m sure your doggy won’t mind one bit!

20140807_154413 20140807_154354

Enjoy, Canine Friends!

P.S. If you try out this recipe, share it on Instagram or Facebook and use hashtag #TrueHealthTrifecta so I can see how yours turned out! ;)

Are Fatty Foods Addictive? Do you eat ice cream? Must watch! (VIDEO)

It’s been a while since I’ve posted an update, blog, recipe, other fun-filled reads… BUT, this.

THIS.

Why am I choosing to share this video out of the hundreds of other videos, studies, essays, and research I’ve come across proving the message that is being put across? It’s pretty simple, really.

  1. It’s short enough to get and keep your attention for the whole thing.
  2. It’s JAM-PACKED with legit, clinical studies and information proving the point.
  3. It relates to a common struggle MANY OF YOU have expressed, and are unsure why.
  4. It’s quickly impactful, incredibly relevant, clear & concise…

Basically, it’s just good.

If you watch one 5-minute video this week, or this year… It better be this one. I’ll admit, that may even be including my own videos for you guys! There is a lot explained in this short video that can be a huge eye-opener to many people (which, in turn, will help you MAKE and STICK to your healthy choices):


What do you think? Does any of thing ring true to you? If you’ve gotten my Nutritional Cheat Sheet, you will see my notes regarding single foods that are both high in fat and carbohydrates (think ice cream, fried anything – especially sweets, most anything sugary and processed, even peanut butter, to name a few).

Hint: As you know by watching the above video, you want to steer clear of such apparent deliciousness!

Let me know what you think about this beneficial lil’ video of education in the comments below; will this effect your food choices from here on out? Have you experienced any of the side-effects mentioned when it comes to dopamine or satisfaction? Discuss!

P.S. Lots of great updates coming soon including my first exclusive e-book, members-only recipe book, instructional videos, and more! Make sure to sign up to our mailing list for updates and don’t forget to browse around the place! :)

EASY, Go-To Protein Shake Recipes!

Common Question: How do I USE protein powder?

Depending on the type of protein powder (for the sake of simplicity, I will refer to the two more common comparisons: whey and plant-based), there is little difference when it comes to actual preparation and ways to enjoy.

Compared to whey, plant-based protein (like my favorite: RawFusion), tends to act more like a ‘flour’ when mixed or baked into different things. It is a bit thicker, slightly harder to blend, and can even be made into a pudding quite easily (similar to casein protein for anyone familiar with Casein Fluff). Whey, however (especially whey isolate), tends to become more gummy and liquid-like and would not suffice in a pudding-type treat. Due to this, it does blend into liquids or other foods, like yogurt, much faster and easier.

So in the case of consistency, plant-based proteins = thicker like flour; whey proteins = easier to blend into liquid. Regardless, both are great for blended smoothies. And since most clients I have worked with are in need of a convenient way to use protein powder as opposed to becoming the next Master-of-Creative-Culinary-Uses-For-Protein (guilty, as proven by the video at the bottom of this post), I will share a couple of my favorite go-to protein smoothie ideas that are easy, delicious, and nutritionally-sound.

These are great any time of day: breakfast, an hour or so before your workout, after your workout, or literally any time. Sure, there are certain benefits timing-wise if you want to get more detailed with the science of nutrient absorption versus activity and a whole slew of other metabolic factors, but what ultimately matters is simply getting into the routine of having additional protein and feeding your body favorable nutrients in general. Trust me. Do not over-complicate things, especially with new routines. Focus on the grand scheme rather than minute details. Have your shake or smoothie where it fits best for you and your schedule.

Remember: it is best to start with small and simple habits!

Protein Mocha Frappuccino

  • 8-10 oz. unsweetened almond or coconut milk
  • 1 scoop Protein Powder of choice (or 2 for active men) *I use RawFusion
  • 1 Tbsp. Instant Coffee Granules
  • 1 Tbsp. Unsweetened Cocoa Powder *omit if you’re using Chocolate-Flavored Protein
  • 1 Handful of Ice
  • 1 Tbsp. Chia Seeds OR 2 Tbsp. Ground Flaxseed
  • Optional: 1 tsp. vanilla extract, or any extract of choice! Coconut, Mint, Orange, Banana.. tons of fun flavors out there! Be creative!

Blend in blender and enjoy!

Fruity Protein Smoothie

  • 8-10 oz. unsweetened almond or coconut milk
  • 1 scoop Protein Powder of choice (or 2 for active men) *I use RawFusion Vanilla
  • A big handful of raw spinach
  • 1 Cup Frozen Berries
  • 1 Tbsp. Nut Butter, Coconut Butter, Chia Seeds OR 2 Tbsp. Ground Flaxseed
  • Optional: 1 tsp. vanilla extract, or any extract of choice! Coconut, Orange, Banana… get creative!

 Blend in blender, sprinkle some cinnamon on top, and enjoy!

*For those seeking a trusty, inexpensive little blender, I always suggest this Hamilton Beach Single Serving Blender with Travel Lid. It is easy to find (sold at Wal-Mart or Amazon.com for $12-14), blends your shake smoothly, lasts FOREVER (I’ve had mine for over 6 years, plus check out these reviews), and is great to keep at work and/or at home.

The great thing about smoothies is that you CAN very easily adjust and get creative according to your taste! Make it a Veggie Smoothie by adding in some cucumbers, celery, spinachMake it an Apple Pie Smoothie by using vanilla protein, cinnamon, a chopped apple (or even organic apple sauce), and some walnutsMake a Pumpkin Pie Smoothie by using pumpkin puree, vanilla protein, cinnamon, ginger, nutmeg, and some pecans… Don’t be scared to try new things! You’ll be surprised at some of the deliciousness you come up with.

For those who ARE open to becoming more creative with protein powder, try mixing it into some organic Greek Yogurt, or mixing it into cooked and cooled down oatmeal, or even making it into a pudding like I mentioned and using it as a dip or sweet cream sauce like I did in this recipe.

Want to get really fancy?

Check out this video recipe for Protein Marshmallows!

Coming soon: Recipes for both my easy, homemade chocolate bars and simple, sprouted grain “graham” crackers to use with the Protein Marshmallows for the delicious S’mores-From-Scratch as shown here…

Smores

Like I said, the possibilities really are endless! :)

Macronutrient Cheat Sheet now available!

Whether you are new to fitness and starting off your fat-loss journey, or you are playing with a macro-based form of nutrition and dieting (like IIFYM, or If It Fits Your Macros); or you want to learn more about the “categories” your favorite foods fall into in terms of Protein, Fat, Carbs, or Fiber; or you want to practice a sustainable way of figuring out portion sizes that doesn’t require you to carry a scale or measuring cups around (because, honestly, who wants to do that?!)… I am excited to share this with you!

Here is a little “cheat sheet” that I made specially for my clients, which is now available to all of you in the store!

This affordable, simple-to-follow Cheat Sheet will help you learn:

  • Numerous common different sources of protein, carbohydrates, and fats

  • Which common whole foods are natural combinations of proteins/fats or protein/carbs

  • General suggested serving sizes for men and women (that don’t involve measuring cups!)

  • General food timing suggestions for optimal progress or fat loss

  • Additional tips about fiber, greasy/junk foods, and seasonings

It has proven to be a huge help to many of you guys already, which makes me super happy to hear because I put a lot of thought and time into it for you all! I definitely encourage you to order up (it’s a full-size .PDF download you will gain access to once purchased), print it out, and keep on the fridge!

Shoot, print out a few and keep one at work and one in your wallet or purse, too. Look it over as a guide whenever you need to, and feel free to share it with friends!

THT Macro Cheat Sheet-page-0(1)

An even better idea (and how I provide these wonderful little things to clients in person) is to print your Cheat Sheet in half-page size and then laminate it at a local office supply store… this way you can circle or cross off foods with a dry erase marker, making it a compact re-usable grocery list!

IMAG1097-1

Whether you are just starting out towards your fitness journey with nutritional awareness or well on your way and in need of a handy guide to keep things in check, I hope this acts as a useful tool for you or someone you know! :)


Get yours here: Macro-Nutrient Cheat Sheet


3-Minute Chocolate Protein Cake (aka: the 2:30 AM Mudd Cake)

I’m going to keep this short and simple so you can try it, stat. Here is something so easy, SO yummy, and my clients have probably heard me mention it once or twice (hence the requests for this post, which I apologize for how long it took me to do)!
This individually-sized chocolate cake literally takes just a few minutes to make and uses simple, protein-packed ingredients that will satisfy your sweet tooth without artificial ingredients, sugars, or additives. The recipe is also gluten-free, dairy-free, and even vegan if you replace the liquid egg whites with a vegan-friendly egg substitute.
Easy Vegan Egg Substitute:  Mix 2 Tbsp ground flax (seed or meal) with 6 Tbsp warm water. Let sit for about five minutes, until it becomes a gooey, egg-like consistency. Use in recipe as you would eggs/egg whites.
Plus, did you know that cocoa actually has numerous health benefits, including alleviating cravings and encouraging satiety?  You’ll be surprised at how moist, rich, and delicious this turns out (and this is, admittedly, coming from someone who is NOT typically a fan of microwaving anything… never mind baked goods)!
Even more exciting news? This is just the first of a number of recipes (and videos) I will be posting featuring my most favorite, plant-based protein, RawFusion by SAN.
So here she is, the 3-Minute Chocolate Protein Cake (originally named the 2:30 AM Mudd Cake by the other half, who can also be credited for the lovely photo you see below… before it was devoured, of course).

RawFusion chocolate cake

3-Minute Chocolate Protein Cake (makes one serving)

In a mug or small bowl, whisk together the following:

From there, simply put it in the microwave at a power level of 5 for 2 minutes (adjusting that power level is super important to ensure the right finished product here). Anddd… DONE!

(Could that have been any easier?!)

If you want to get even fancier, feel free to top it off with the following:

Sweet ‘n Creamy Vanilla Sauce (enough for two servings of cake)

Simply whisk together the following in a bowl:

  • 1/2 Scoop of RawFusion protein (vanilla flavor preferred here!)
  • 1/4 C. unsweetened Almond Milk (or enough to make it a thick-but-pourable consistency)
  • 1 Tbsp Stevia
  • 1/2 tsp. Pure Vanilla Extract

After the cakes are done, flip them over onto plates and then spoon that goodness on top. You can also sprinkle with some chopped nuts (like the pistachios seen above)! ENJOY :)


How to Make Perfect Hard Boiled Eggs EVERY Time (video)

I absolutely LOVE eggs. Always have, always will. Whether they’re scrambled, sunny-side-up, chopped over a salad, or even straight out of the carton (whites, in that case. And no, it doesn’t taste like foot. It’s tasteless and awesome)… Eggs have always been a staple food in my regime of deliciousness.

Eggs in bowl

Cadbury Creme Eggs were even my favorite holiday treat growing up, for goodness sake. Side note: Are you aware they have actually decreased 30% in size since back in the heyday? Truth.

I partly hold this on account of my dad and the memories of him making his yummy breakfasts of eggs, mushrooms, cumin, and close to a half-stick of butter in a pan. I always wanted whatever he was making because it smelled so warm and spicy. Plus, he always ate everything with Lebanese pita bread. Believe it or not, the pita and butter was my favorite part… I just kind of put up with the eggs (reminder: Nutrition Specialists are not born Nutrition Specialists) and I could still hear my mom saying, “That is TOO much butter for her! Way too much,” to which he would say okay and then slice me off another chunk of golden, melty goodness when she wasn’t looking.

Egg Halves

Coincidentally, I really miss my dad about now… and the thought of that much butter at this point kind of makes my stomach turn. But, I digress.

When it comes to the most convenient form of eggs – hard boiled – there is actually a LOT more involved then throwing eggs in a boiling pot of water and then peeling them after a few minutes. It’s a SCIENCE, and if you don’t have it down, you’ll likely experience one (or all) of the following hard boiled fails:

  1. Tearing and peeling half the whites off with the shell. I call this the Moon Crater fail.
  2. Success with peeling… but a puke green rim (or totally green, for that matter) yolk on the inside. Aka: the Groke.
  3. A yolk that isn’t completely cooked and still runny (which is on purpose, at times, ie. the soft boiled egg).
  4. A cracked or broken shell while boiling which ends up in seeping out whites and tumor-growth looking eggs.
  5. (Add your hard boiled egg fail here)

It came to my attention recently that so many people don’t know exactly how to make the perfect hard boiled egg. Whenever anyone asks me what a good, portable, convenient option is for a snack, one of my go-to suggestions is this winner. However, 9 out of 10 people say they can never make them right! As soon as a couple of clients mentioned spending way too much money on a way questionable means of this amazing, protein-packed snack (*cough* 7-11 ready hard boiled eggs in a plastic baggy), I KNEW I had to share this post to benefit their bellies and everyone else who fears attempting the delicousness that is the HBE.

I’m pretty happy to say I have it down to a science and am even happier to share it here!

IMG_1842

HOW TO MAKE THE PERFECT HARD BOILED EGGS

You’ll need:
  • Eggs
  • Water
  • Large sauce pan with lid
  • Large slotted spoon
  • Large bowl
  • Ice

As an example here, I’m using a small saucepan and just a few eggs. But I highly suggest making these in bulk and using the biggest stock or sauce pan you have because you want to make sure the eggs are covered by a good inch of water without it boiling over once things get moving. Plus, it’s amazingly convenient to have a bunch of them ready to go in the fridge, especially if you don’t have time to prepare food during the day and need a quick snack (or protein for a full) to grab and go.

Step 1: Carefully place cold eggs in a single layer at the bottom of your sauce pan.
Eggs in Saucepan
Notice the bottom egg is a little cracked. At the end, I share a tip that helps salvage the whites if they seep out while boiling.


Step 2: Fill the sauce pan with cold water until all the eggs are completely submerged (about an inch of water above eggs).

Cover with Cold Water


Step 3: Put sauce pan on stove and set it to high to boil.
Put it on to boil
Keep a good eye on it because it won’t need to boil for long…


Step 4: Once water gets going with a rolling boil, let boil for only one minute before removing from stove top.

Boiling eggs


Step 5: Cover with lid and take off the burner, setting it to the side

IMG_1803


Set a timer for 15 minutes. The eggs will continue cooking in the hot water as they sit.

Timer


Step 6: Fill up a large bowl halfway with ice and then up about 3/4 high with cold water

Ice Bath


Step 7: Once timer goes off, use a slotted spoon to remove eggs from sauce pan and place in ice bowl.
IMG_1809Eggs in Ice


Let sit about 10 minutes, until ice is mostly melted down.
Eggs in Ice Bath
Can you guess which egg is the one that had the crack in it?


Now. Time for things to get serious.

Peeling

 You’ve made it this far, peeling glory is soon ahead.
And what would an instructional post be without a little video for the visual people?

Main tricks are:
  • Have water handy for rinsing (and even peeling under). It will help the shell slip off.
  • Tap both ends of the egg gently on a counter, then do a gentle “rolling’ motion to break it all around before peeling off (this REALLY helps!)
  • Use the side of your thumb to gently glide the shell off (as opposed to nails or the tips of your fingers). This alleviates risk of tearing any whites off with the shell.
  • Organic, brown eggs are harder to peel than regular, white eggs. Basically, the fresher the egg, the harder to peel. I definitely suggest and prefer organic, free range eggs if you plan on eating the whole thing including the yolk-y goodness. But if you mainly just want the whites, it will be easier on your prep (and wallet) to just get regular white eggs.
  • Try not to eat them as you’re peeling. At least not all of them. Yummy little health balls they are.

Additionally, if for some reason an egg cracks in the pot and whites start seeping out (like one of mine did because it had a slight crack in the shell before putting in), have some distilled white vinegar handy and throw a splash or two in the water as it begins to heat up. This helps the white coagulate faster and works well to salvage the egg.

Food for thought: Do you feel like hard boiled eggs make you bloated and gassy?

There is actually justification for this. Eggs (particularly the whites) are very high in sulfur… what most people familiarize with the “rotten egg” or Florida sprinkler system smell. Sulfur is a beneficial nutrient and one of the reasons eggs are a great super food. Any time eggs are cooked, the sulfuric compounds in the proteins are broken down and hydrogen sulfide is released (the cause of that smell). In the case of the HBE, however, this hydrogen sulfide has nowhere to really go. The green rim around the yolk from “overcooking” is actually a reaction between the ferrous iron in the yolk and the hydrogen sulfide in the white (yay, science)!

Some people poke a tiny hole with a very small needle in the shell of the egg before boiling to release pressure and claim this eases any digestive upset caused by the broken down proteins. I’ve never noticed any digestive issues regarding HBE’s personally, but it may be worth trying if you’ve had this issue! People also claim that poking the tiny hole encourages more even cooking, making the eggs easier to peel. But, as you can see once you try my method, a hole isn’t necessary for super hard boiled success!

Now time to go enjoy them however you like! My preference is simple with a bit of sweet and tangy homemade ketchup :)

Delicious Eggs

Now that you know how to cook them up, what is your favorite way to eat hard boiled eggs?

EFT Level I & II Training this September!

I know it’s been QUITE a long time since my last post… But I had to share something I am REALLY excited about.

There is a wonderful training opportunity coming right here to Orlando soon. My friend and colleague Ruth Stern is presenting a 3-day training on EFT- Emotional Freedom Techniques-  This training is approved for all Licensed clinicians who will receive 21 CEUS for this training (mental health counselors, social workers and marriage and family clinicians). This training is also open to all holistic practitioners and coaches and healing professionals!

I have benefited greatly in my business as a personal trainer and nutrition specialist by also incorporating EFT as an EFT Coach. This technique has helped my clients on the road to optimal wellness, and it has also helped me personally. It is an amazing tool from all angles, and the training itself not only teaches how to practice it (and coach others) but also acts as a weekend of energy therapy counseling for yourself. I even had a film crew in the area ask to feature my unique “holistic personal training” approach in a short documentary. You can watch first-cut version of Tapping Into Health here:


(You’re very welcome for the most flattering still shot ever.)

The training will be held September 20-22, 2013.

If you register before September 1st, you get the early bird special. Plus, another great benefit for anyone within driving distance from the Orlando area (like myself) is that you save money on hotel and travel!

It is a truly cutting edge technique that will transform your practice and your life. You will learn this powerful energy psychology technique that promotes rapid mind-body healing and eliminates blocks to success.

You will:

  • Learn simple yet powerful techniques to rapidly improve the functioning and well-being of your clients
  • Heal trauma and painful memories, anxiety, depression, pain and phobias with this energy psychology modality
  • Clear negative thoughts and emotions that block success for any type of goal (financial, weight loss, finding love etc.)
  • Stop self-destructive habits and patterns
  •  Be involved in lots of  hands-on (literally!) demonstrations

To get more information about this training or to register, click on this link.

Make sure to enter that you were

referred by Jasmin on the check out page.

Please feel free to share this post with anyone who can benefit from becoming a Certified EFT Practitioner, whether it is a LMHC, business coach, health coach, or energy healer. Even if you are simply seeking one of the most effective stress management tools for yourself and not one of the mentioned counselors or coaches, I still highly recommend this training with Ruth!

I look forward to seeing you at the dynamic training (yes, I will most definitely be there)! :)

The Ultimate Chopped Spring Salad

This Healthy Recipe of the Month is probably my favorite go-to salad. It’s just perfect to fulfill a craving… it’s filling but still refreshing as a salad should be. I’m a huge texture person and my perfect meal usually has a mix of different bites; crunchy, soft, crispy, creamy, salty, and sweet. This salad definitely has all of that rolled into one. Not only that, but as you can see, it is ridiculously easy to put together AND can be served as a main dish or side salad to accompany a meal.


Hope you enjoy it as much as I do!


Nom nom nom .........
Nom nom nom ………


As I’ve mentioned in previous posts, this is an easily printable format that I provide for health clubs like Anytime Fitness in Ormond Beach and Anytime Fitness in Winter Park, both in Florida. If you would like to receive a Healthy Recipe of the Month for your fitness club or gym, please don’t hesitate to contact me and I will be happy to add you to the list! :)


Question of the week:
What is the BEST salad, homemade or restaurant, that you’ve ever had?


Quinoa Cocoa Cakes for Two

… or for however many you like, really. This impromptu what-do-I-have-in-the-pantry-that-I-can-make-dessert-ish recipe is VERY easy and came out to two super moist and tasty little cakes. The consistency is almost fudge-like; the outside is just crisp enough to make it sort of a less gooey chocolate lava cake.


Yes it is as decadently good as it looks.....
Yes it is as decadently good as it looks…..


And added bonus, they are egg-free, gluten-free, paleo-friendly (depending how strict of a regimen you’re on considering there is a pseudo-grain flour involved), and it can easily be vegan/dairy-free by simply substituting the kind of protein used in the sweet cream sauce to something like Sunwarrior Protein-Vanilla. Make sure to check out the notes below the recipe for more tips! :)


Try it out and let me know what you think!


Quinoa Cocoa Cakes for Two

Ingredients:

1/4 Cup Quinoa Flour

2 Tbsp cocoa powder

3 Tbsp Stevia*

1/4 tsp. Baking Powder

Pinch of salt

Scant 1/4 tsp instant coffee or espresso (optional)

1 Tbsp Ground Flaxmeal

1 Tbsp Extra Virgin Olive Oil*

1/4 Cup + 3 Tbsp water

1/4 tsp. Vanilla Extract


What to do:
Preheat oven to 350.*
In a small glass or bowl, whisk together flaxmeal, olive oil, water, and vanilla extract. Let sit for 5 minutes.
In another bowl, mix together quinoa flour, cocoa powder, stevia, baking powder, instant coffee, and salt.
Add flax liquid to dry ingredients and whisk together well.
Split batter into two greased large muffin tins (or I had mini-bundt tins). Bake for 20-25 minutes, until toothpick inserted comes out clean.
Plate each on top of half the Sweet Cream Sauce. Optional tops include.. well.. basically whatever you want. I had a dollop of Son of a Butter! Smoky Bacon Peanut Butter and a fresh strawberry.
*Next time I may try baking at 375 for around 18 minutes. If you like a more cakey, less fudgy center, this option would encourage that more.

 
Crazy Easy Sweet Cream Protein Sauce:

Scoop 1-2 Servings of your favorite vanilla protein powder into a bowl (I used Vi-Shape by Body By Vi since that is all I had on hand) and whisk with just enough water for thick sauce consistency. I added a touch of cardamom and cinnamon for an extra yumminess.


P.S. Don’t forget, if you want photos of recipes as they are created, workout tips, free gym routines, and other random goodness, you can follow me on Instagram or Twitter too. Happy New Year, everyone!